Confluence Hooks for Bitbucket
What is the Confluence for Bitbucket add-on?
The add-on "Confluence for Bitbucket" aims to map and enforce a workflow between Confluence and Bitbucket. Documentation (e.g. release notes, concepts, etc.) must be created at a certain point in the development process. "Confluence for Bitbucket" ensures that code changes are made at the right time and do not bypass your process. Especially from the point of view of development process or also from the point of view of certification bodies, many documents are necessary regarding software development and the quality assurance. It must be ensured that documents are not only available, but also be lived and integrated into the workflow. For example, "software design documents" are necessary or the "change control board" must be documented before the development of a new feature can begin. What about test or review reports? Equally important are test reports or review reports, which must be documented before a new feature or bugfix will be integrated into a target branch.
These are just a few examples where it may make sense for Bitbucket to interact with Confluence. In your company, respectively in your "Development Guidelines" you will certainly find further meaningful rules in which it makes sense to compare the software development with corresponding documents.
It is exactly this interaction that Confluence Hooks takes care of for you. If documents do not exist or simply have the wrong attributes, this add-on can prevent a code change. A push or a merge is rejected and reference is made to missing or incorrect documentation. With each push and with each merge the add-on compares whether your documentation guidelines are fulfilled.
Add-on Setup
Because the add-on will check if a valid Confluence page exists, an application link must exist between Bitbucket and Confluence. Please follow the steps below to create a application link.
| 1 | In the Bitbucket "Administration" menu, select Application links | |
| 2 | If no valid link exists, you have to create a new one using the Create new link button |  |
| 3 |
| 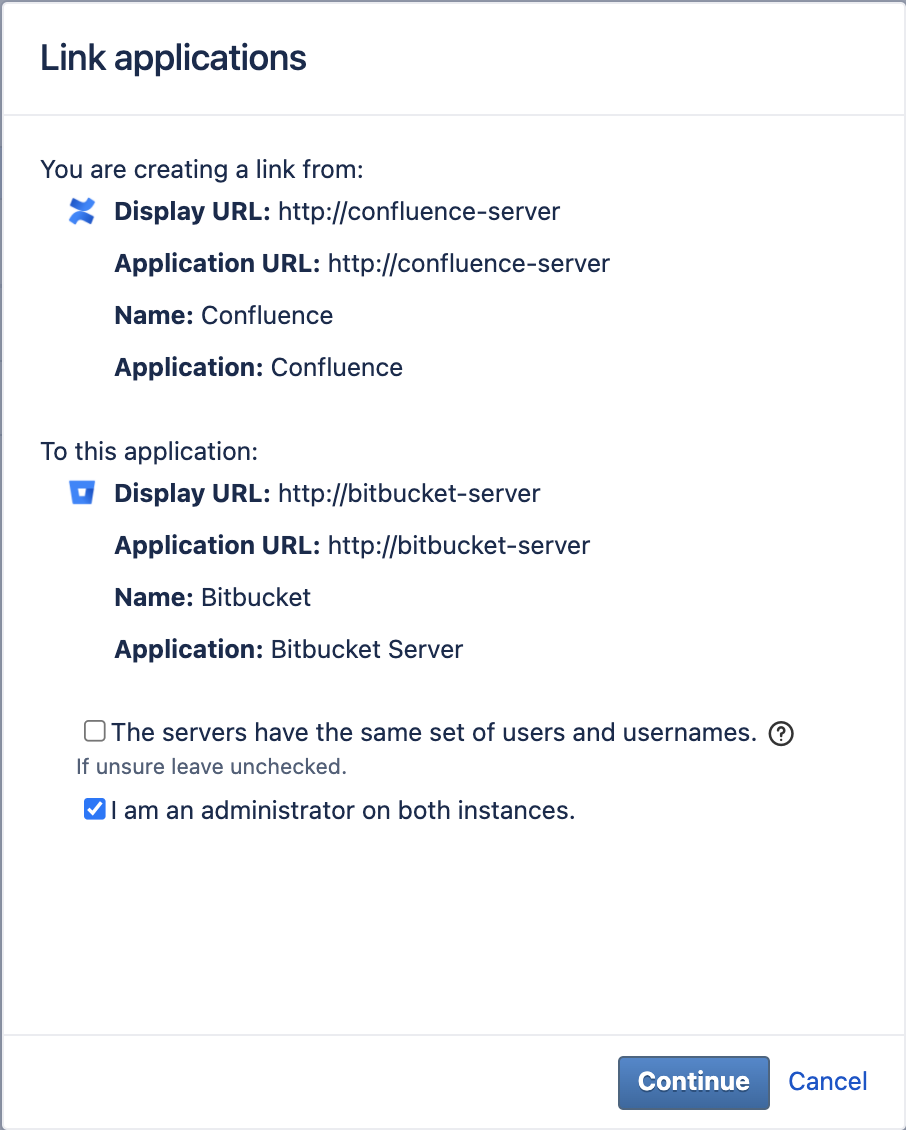 |
| 4 | In Confluence you can now confirm the application link. Please press the Continue button and you will be redirected to Bitbucket. | 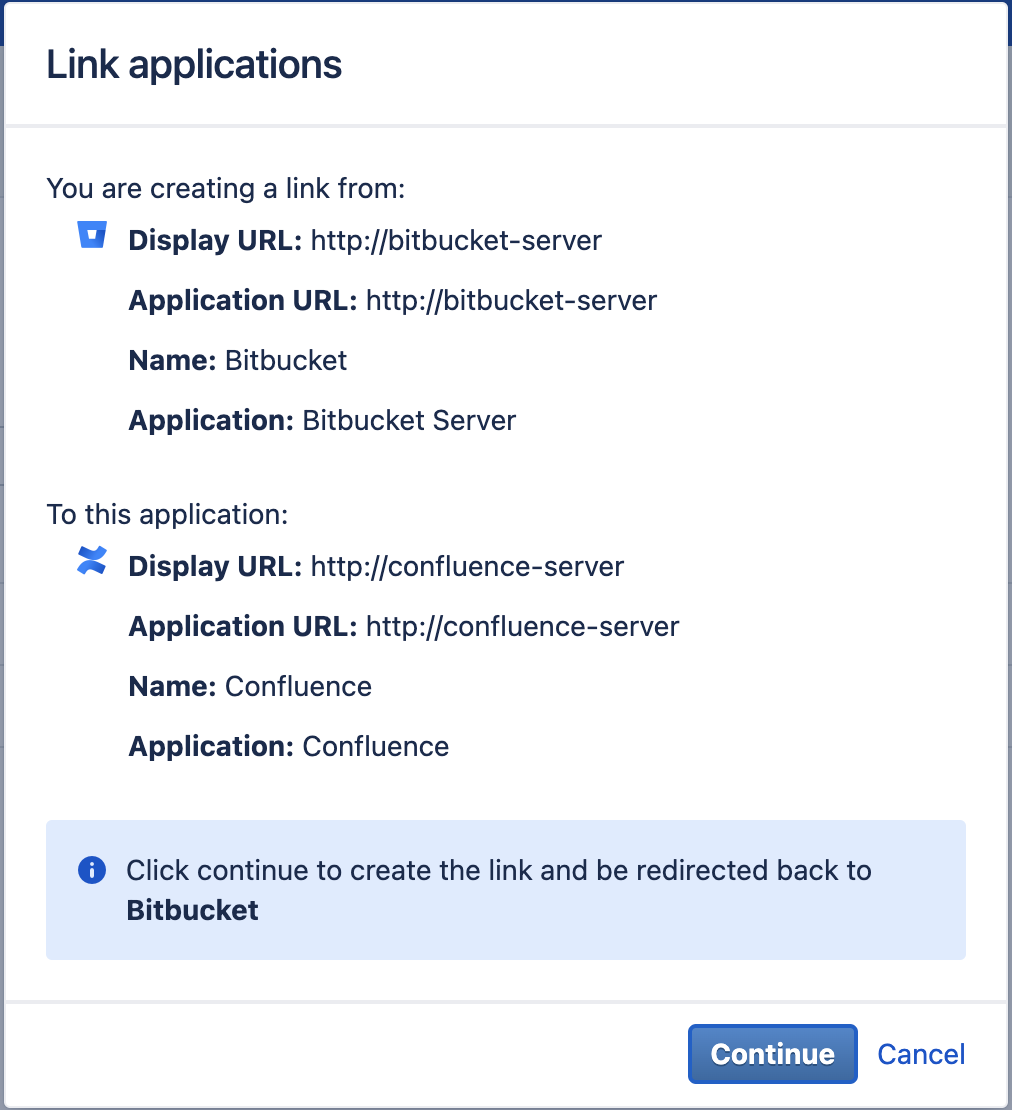 |
| 5 | After the redirection to Bitbucket has been done, you will see a connected a Confluence instance in you application link list. |  |
| 6 | Finally you can check the authentication settings of the application link, via pressing the pen button. By default OAuth should be selected, which is correct | 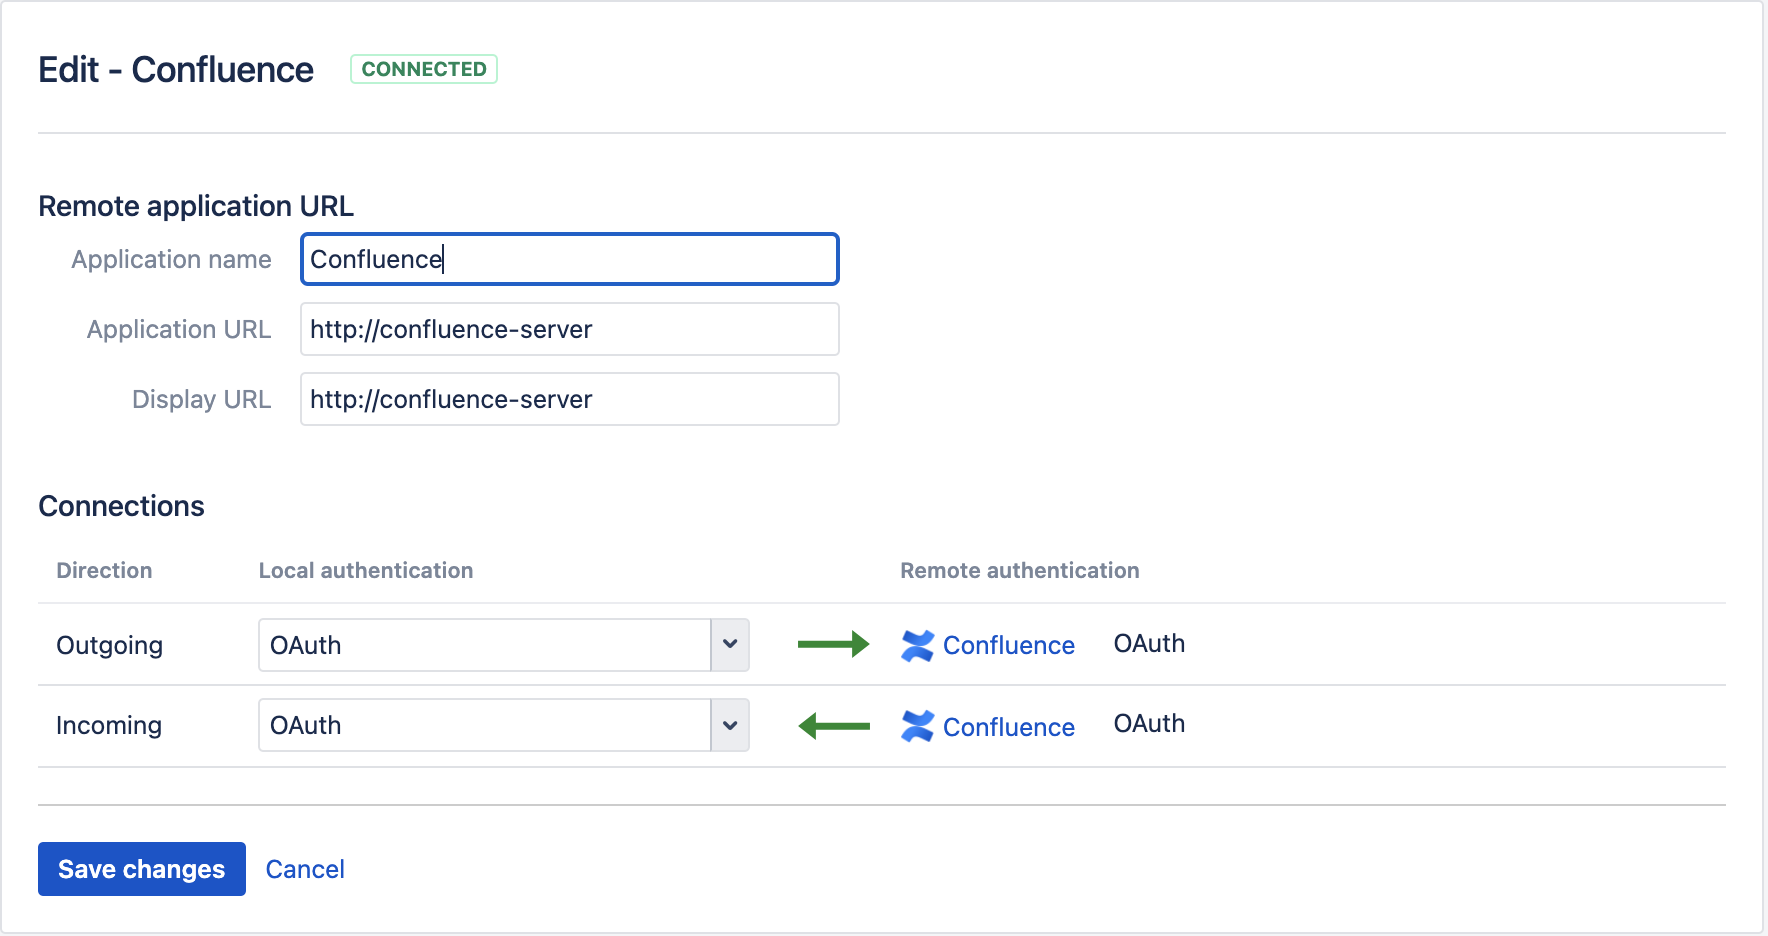 |
Hook Configuration & Hands-on Example
In the next sections we will explain the possibilities of the hook and illustrate the configuration in several steps with a hands-on example. Together we will configure the hook step by step and perform a code change with you to show the effects of the hook.
Where you can find the hook configuration?
Step 1: The configuration of the hook you will find in the administration area of your project or repository
Step 2: You can now find the configuration under the standard place for hook
Hooks if you would like to configure push check
Merge Checks if you would like to configure to configure merge checks
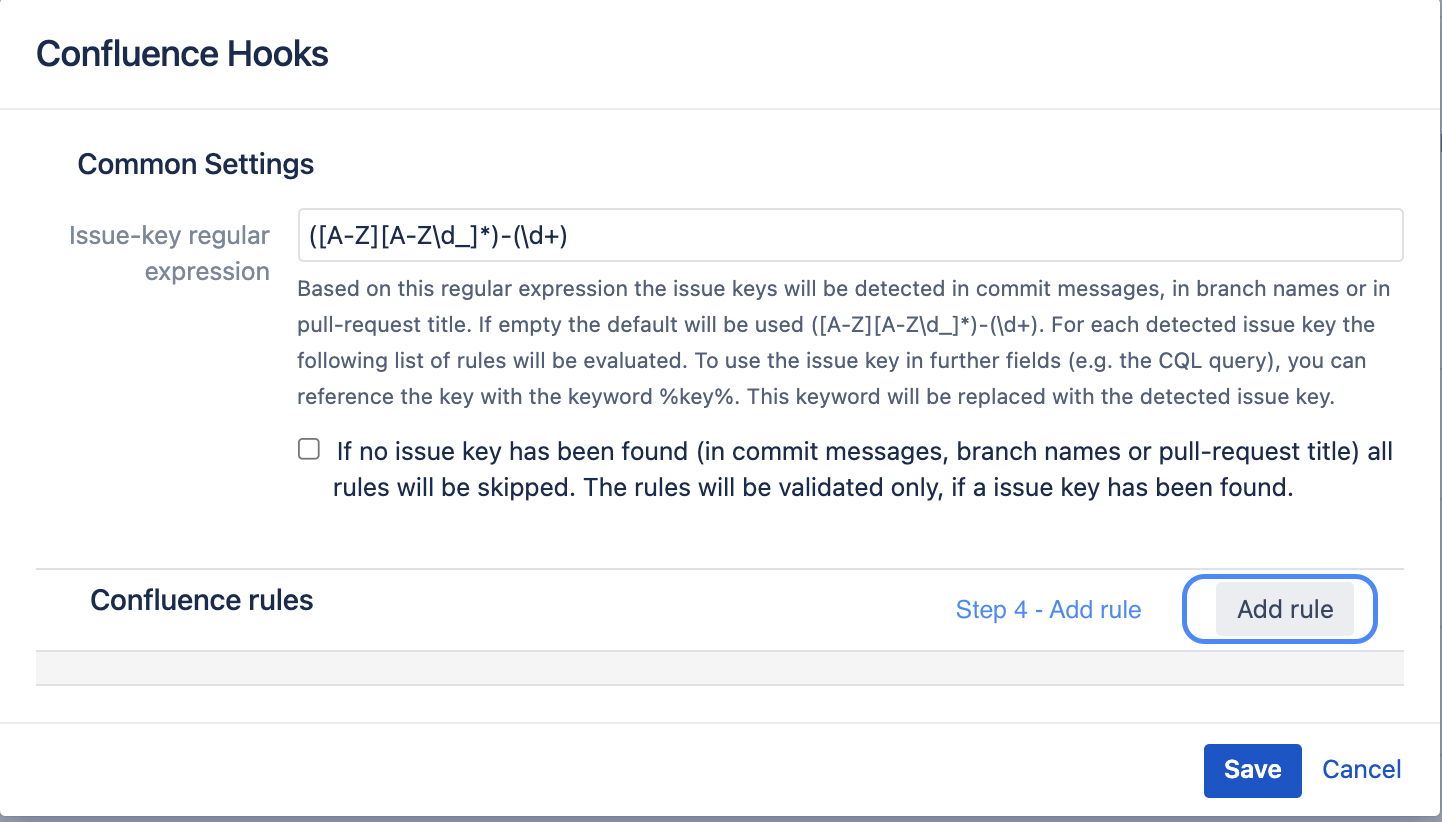
Step 3: Open the Confluence Hooks configuration

How can I configure the hook?
The hook evaluates whether a specific Confluence page exists for a code change or a branch. To better identify this Confluence page, an issue key can also be used, which is found in a commit message. Thus it is possible to capture the issue key from a commit message and use this information when searching for a specific page. More about this in the following sections. To capture this issue key a regular expression is used, which can be configured via the field Issue-key regular expression (see screenshot). Of course, you don't need an issue key to search for a Confluence Page. But usually it makes not much sense to do this, because an issue key is an important factor to identify a corresponding page for a code change, because an issue key is representative for a code change. And normally you are looking for pages which have a direct relation to a code change. But maybe there are commits in your workflow which do not contain issue keys. These issue keys can be excluded from further evaluation. For this you can select the following option. If this is the case, all further rules (which will be configured afterwards) will not be evaluated if no issue key was found. Normally, you do not need to change anything in these settings and can proceed directly to step 4.
The validity of the issue is not checked. The issue key is used exclusively in the fields of a rule. If you want to check the validity of the issue key, please use the Jira Hooks for Bitbucket add-on.
Step 4 - Add Rule: Confluence rules can be added using the "Add new rule" button. Any number of rules can be defined. For a valid hook configuration at least one rule has to be added.
Step 5 Possibilities to configure a rule
A rule aims to find one or more Confluence pages and evaluate this page against the configuration. As soon the configuration is violated, a push or merge is rejected. Since a check is always performed based on a code change, the properties of a code change should also be able to be used for a search. Therefore, different information is available as keywords to be able to use them in the further rule configuration.
Keywords:
%key% - Represents an issue key which was found.
%branch% - Represents the branch name where the changes were made.
%hash% - Identifies a hash in which e.g. an issue key was found
The keyword can be used in any option, even in error or hint fields. Before a rule is evaluated, the keywords are automatically replaced with the appropriate values
A rule is evaluated for each issue key found and for each branch found. So if 3 different issue keys are pushed in one or more commit messages, then each rule is checked for each issue key and each branch. So in this example the rules are checked 4 times (3 issue keys + 1 branch).
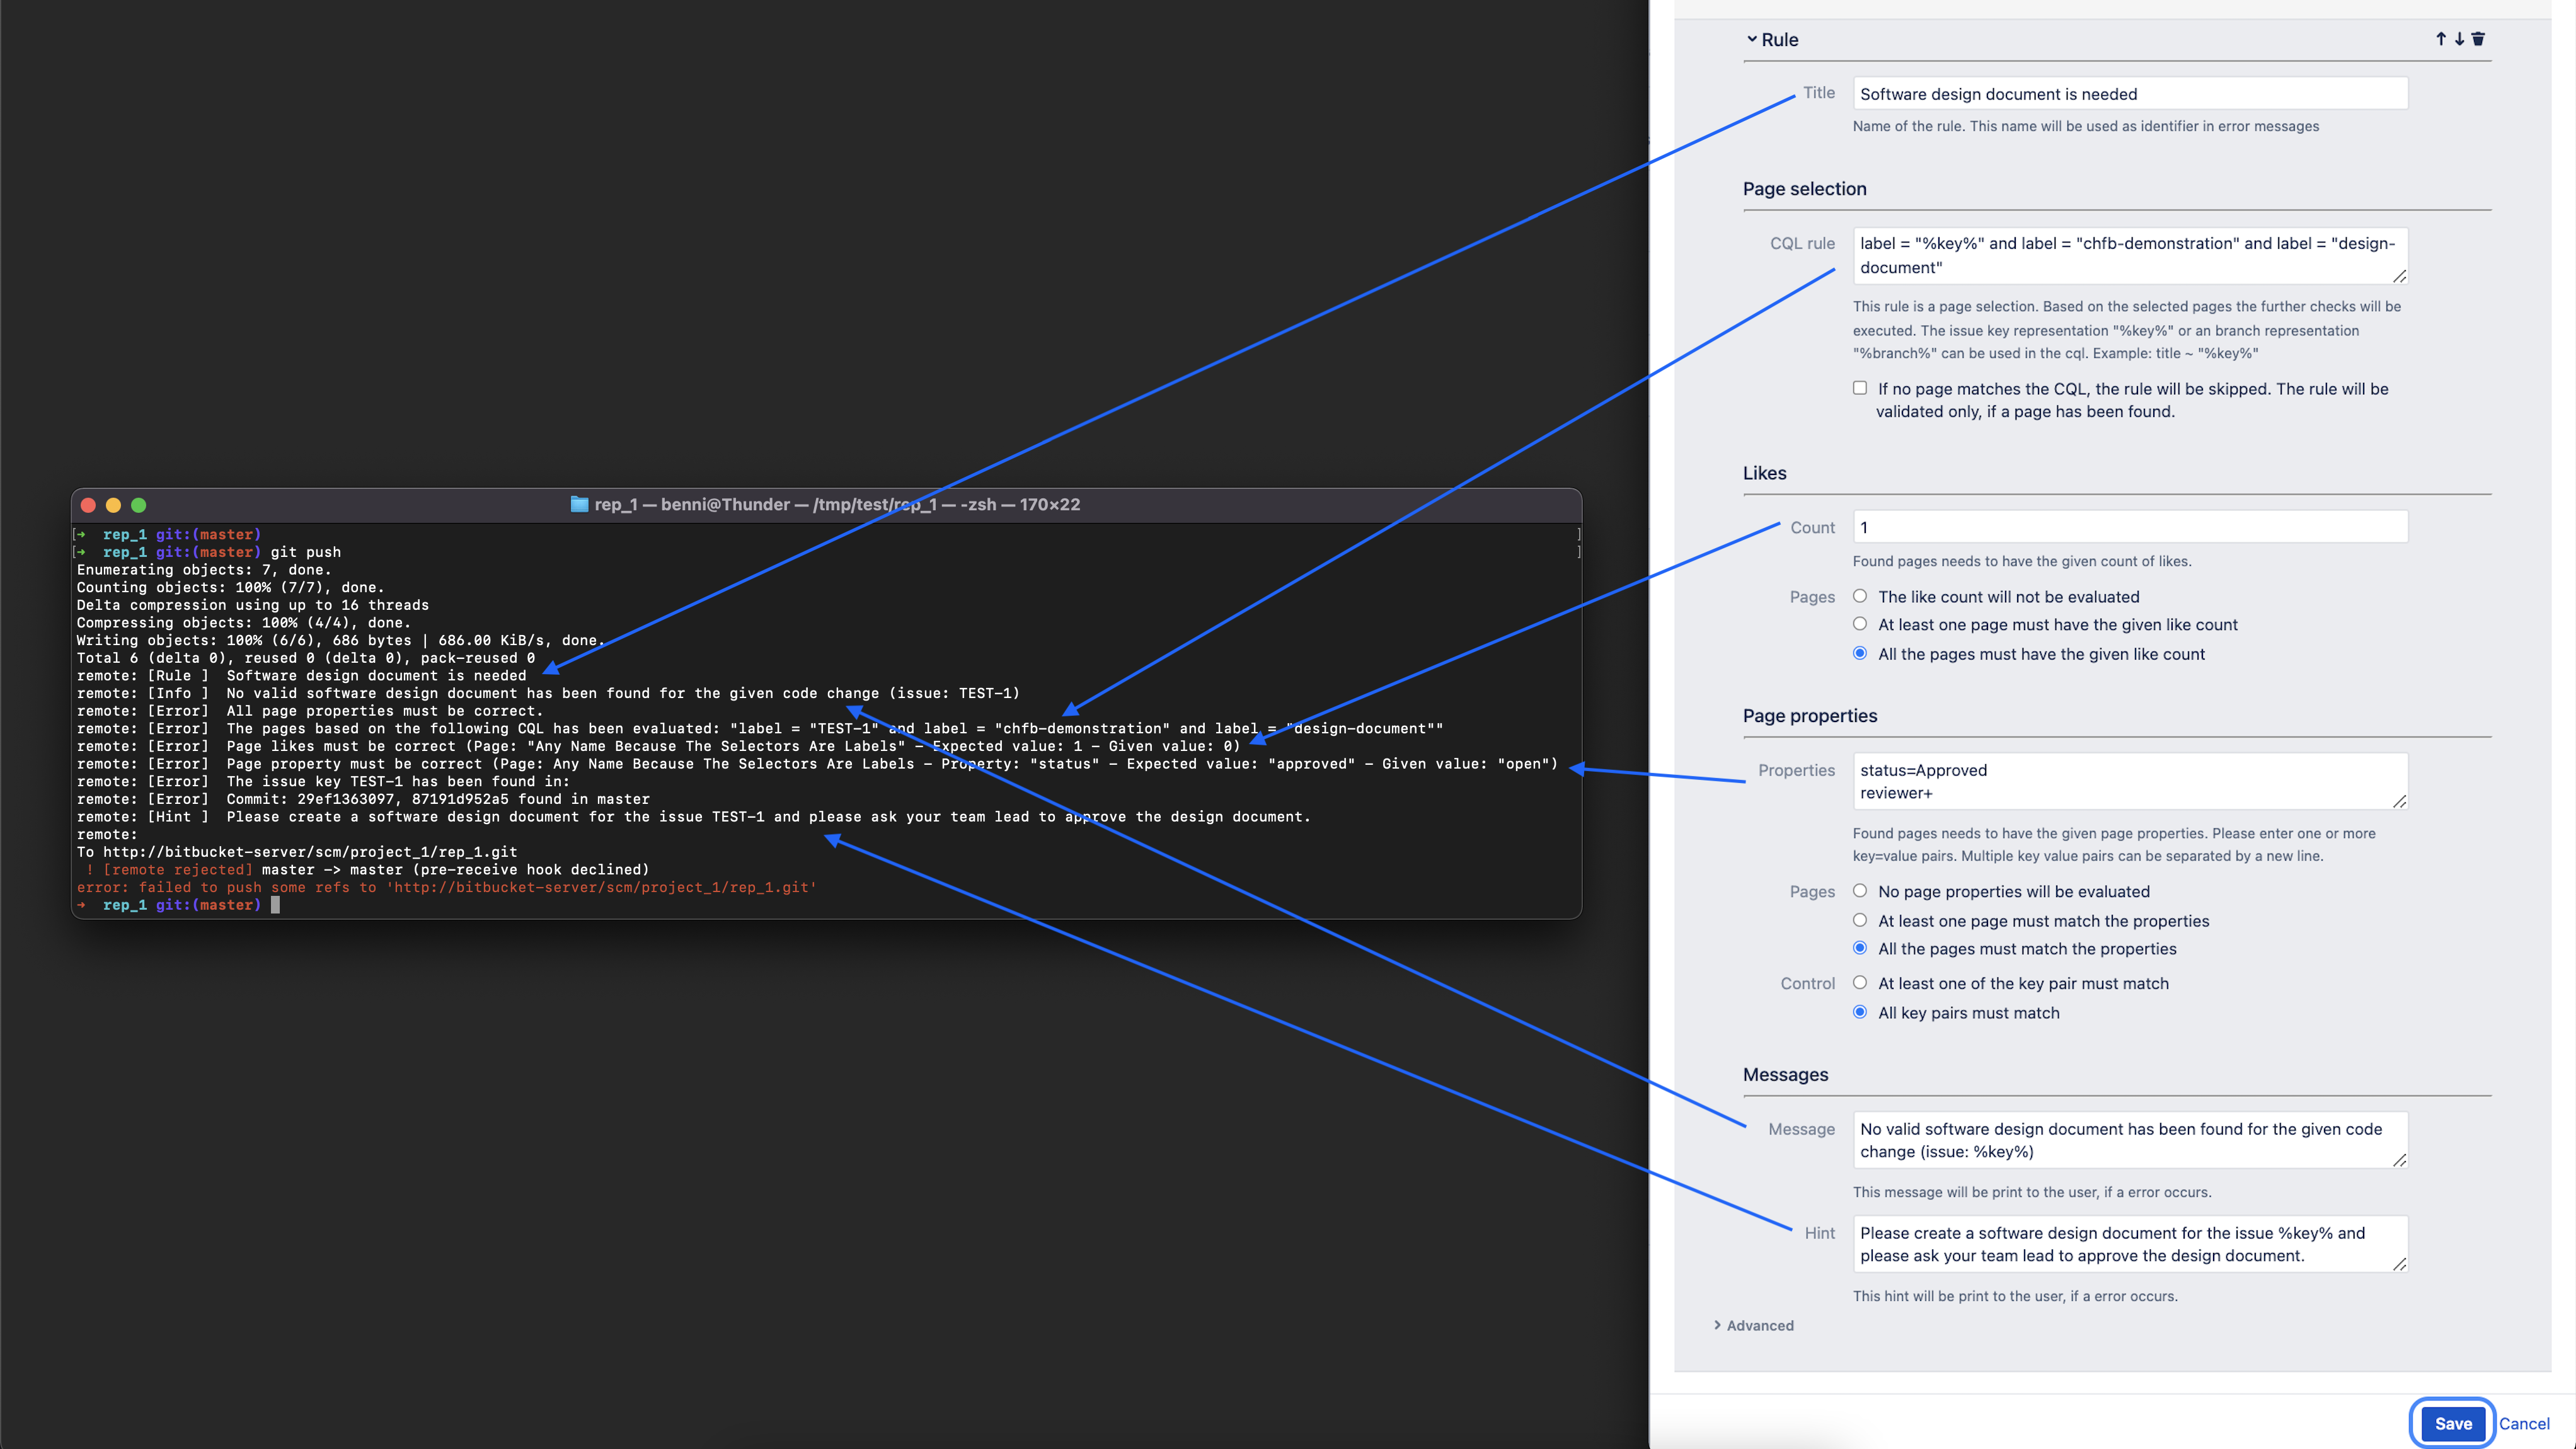
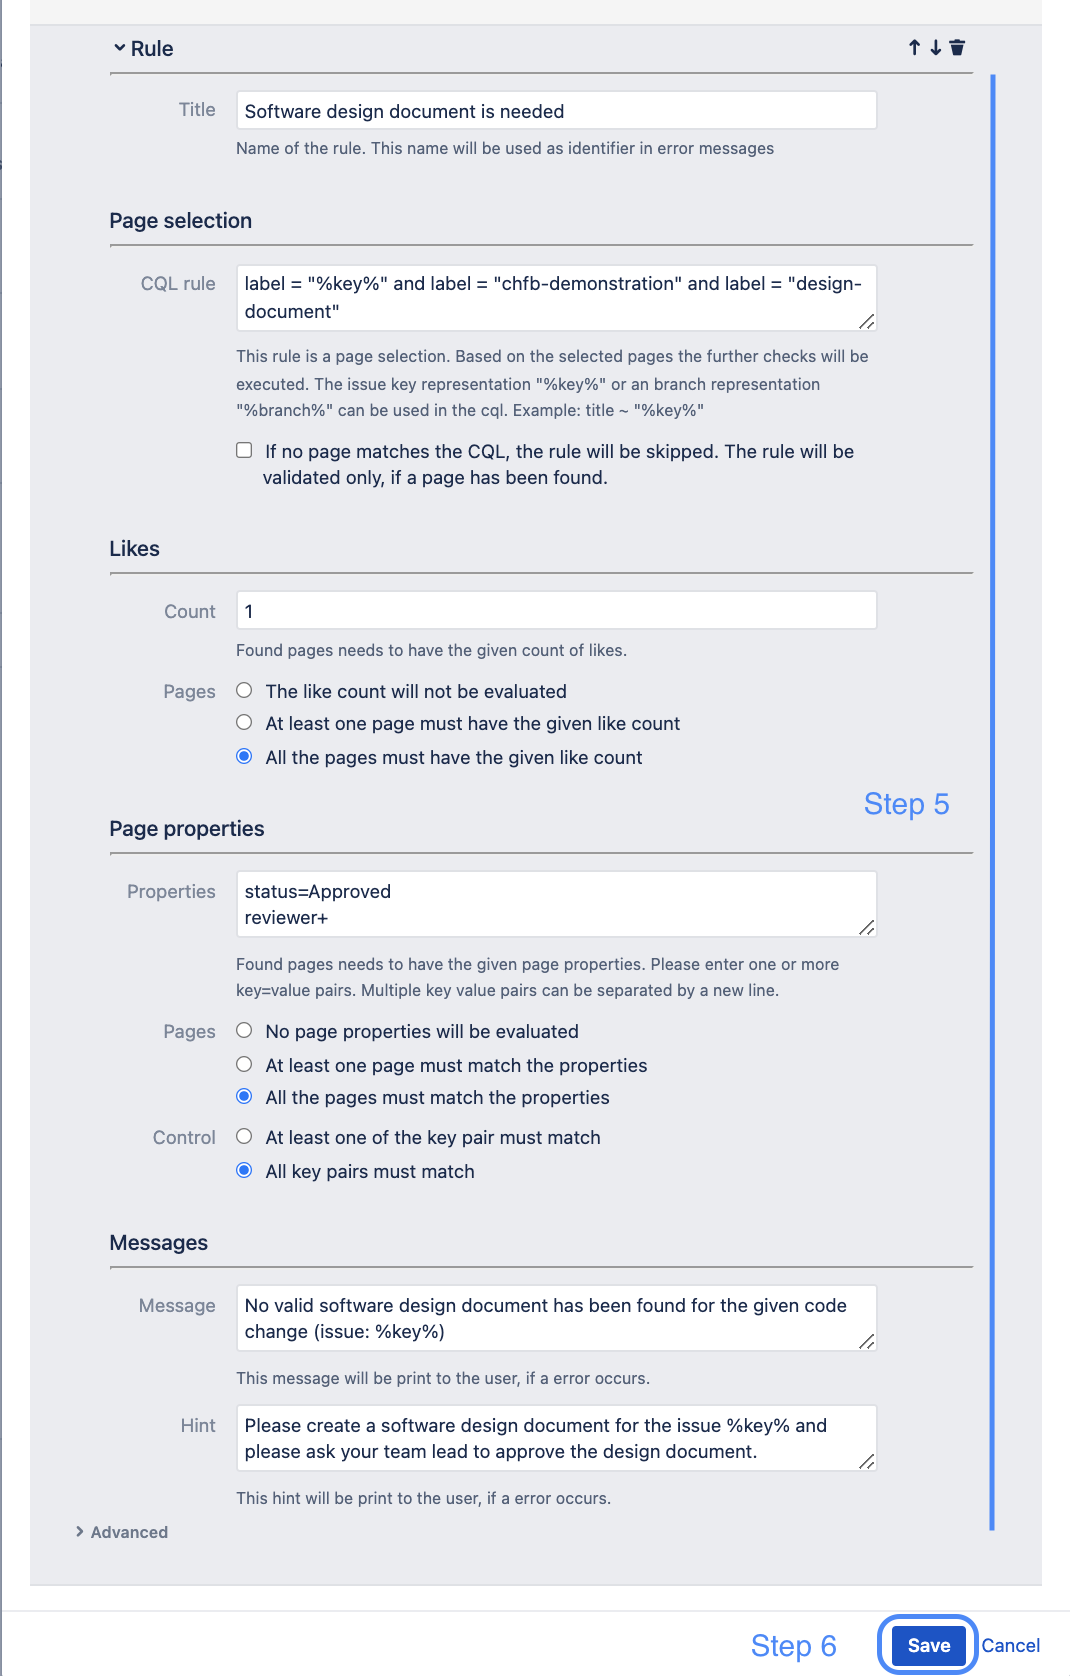 | Rule Options To follow our hands-on example the following options are now occupied. You will find a short description of the options as well as snippets, which you can copy directly into the respective options.
|
$body$body$bodySteps 7 - 11 Create a Confluence Page
Open the Confluence instance you configured as an application link and create a Confluence page in any space. Of course, the user you use in Bitbucket should have read permissions on this page via the application link.
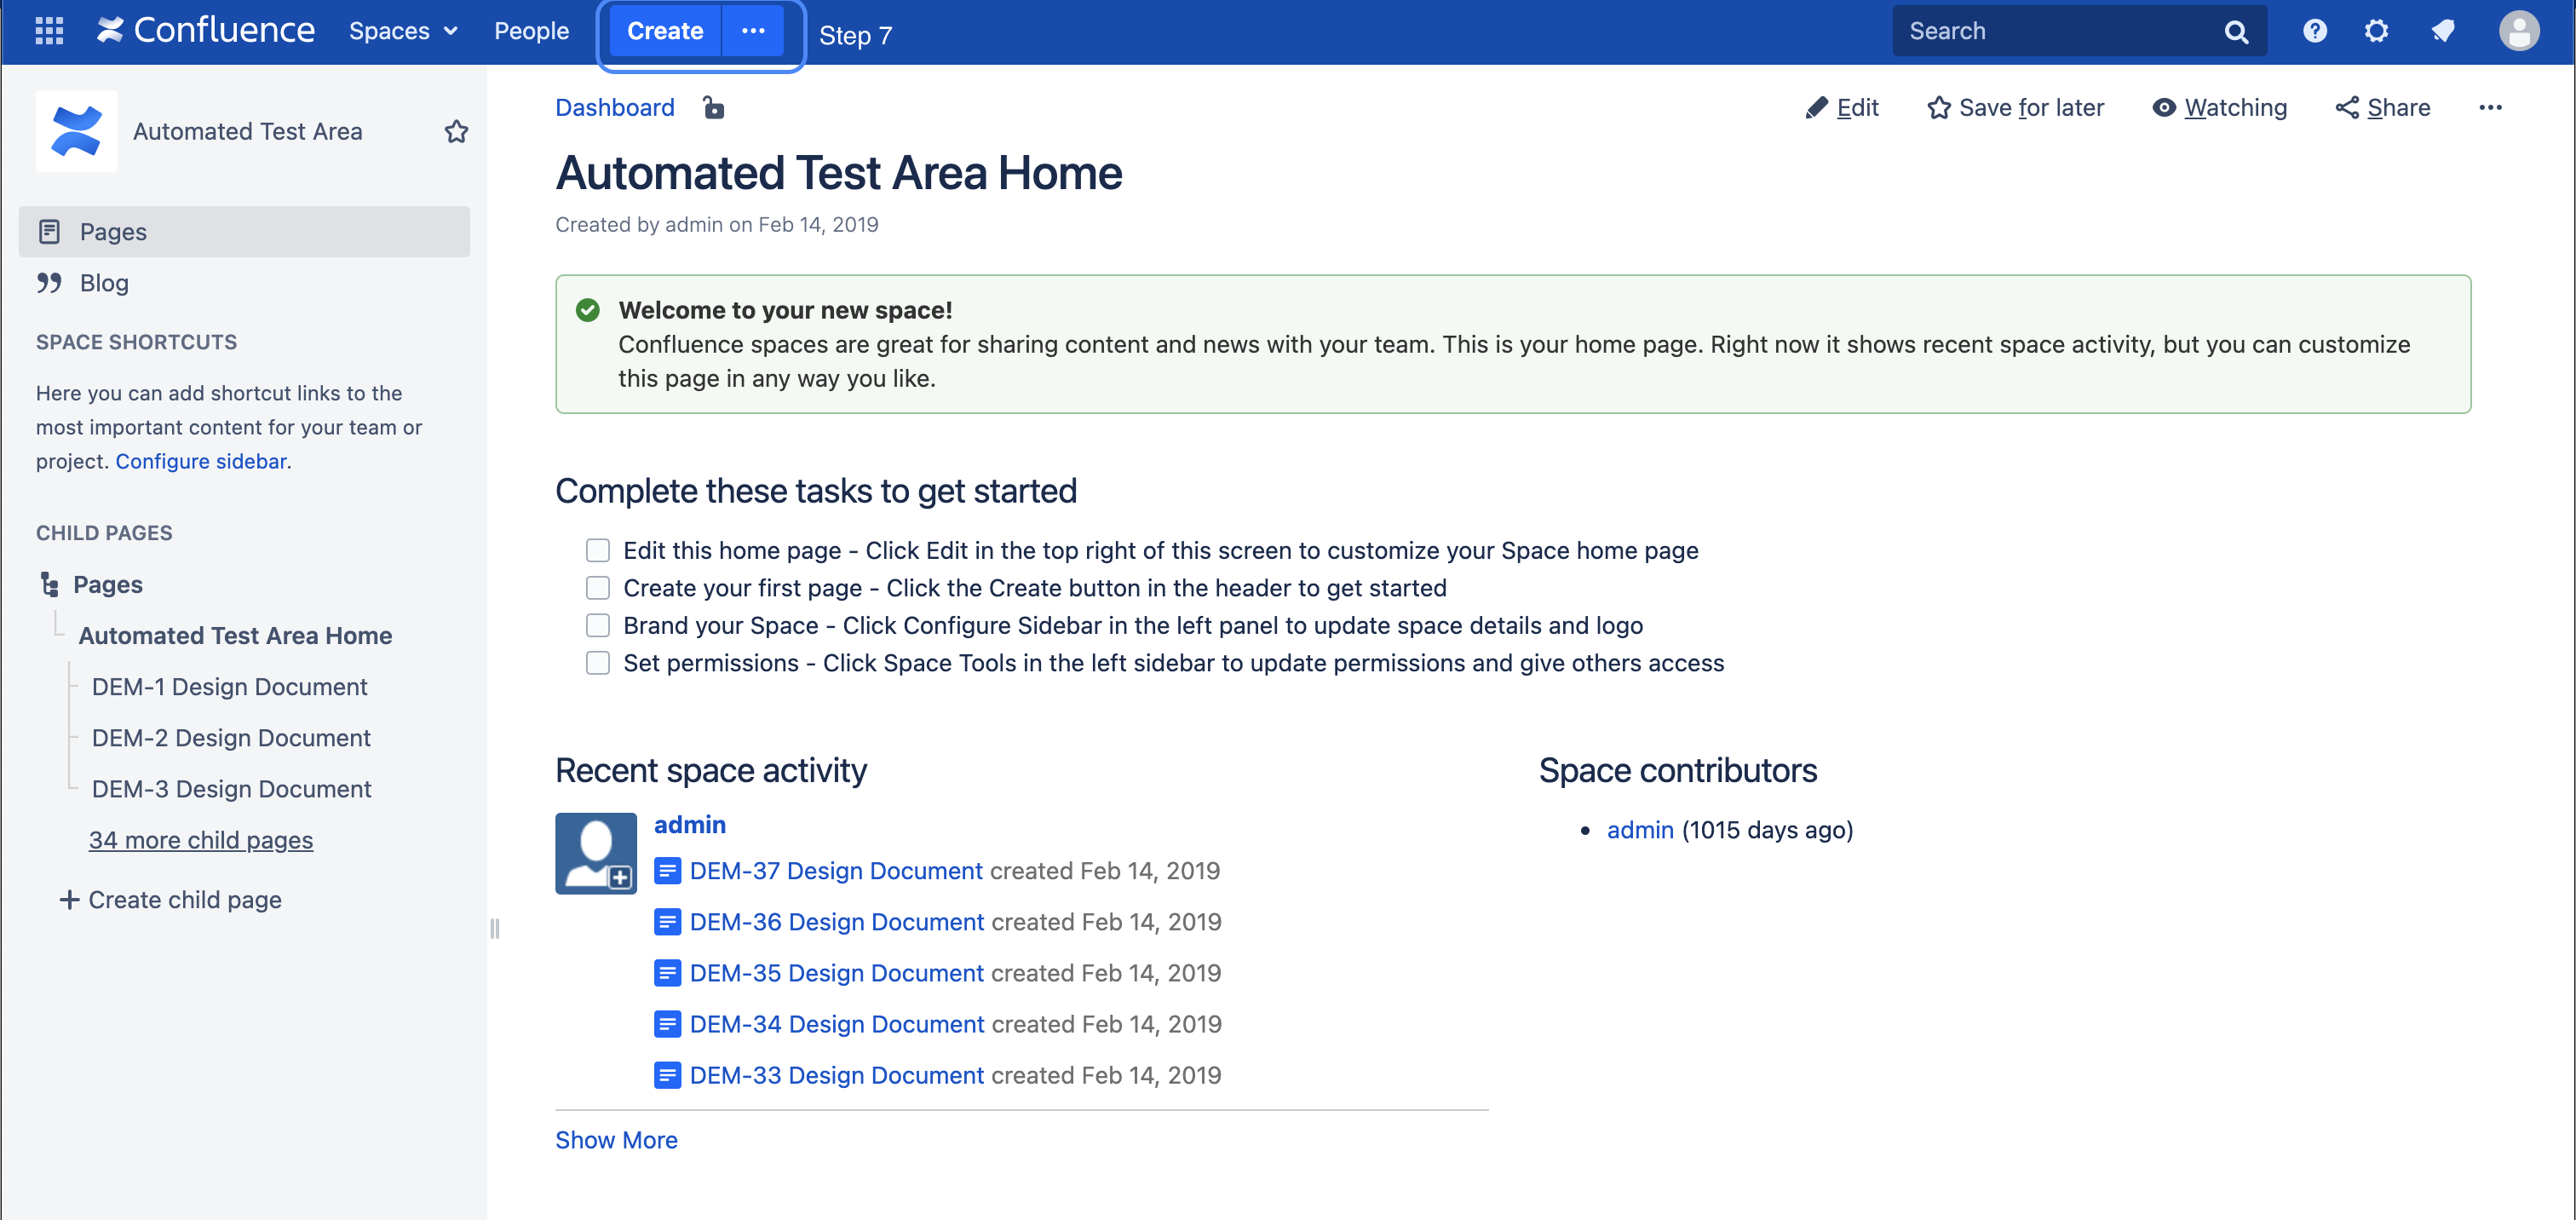 | Step - 7: Create a Confluence page as usual via the Create Button |
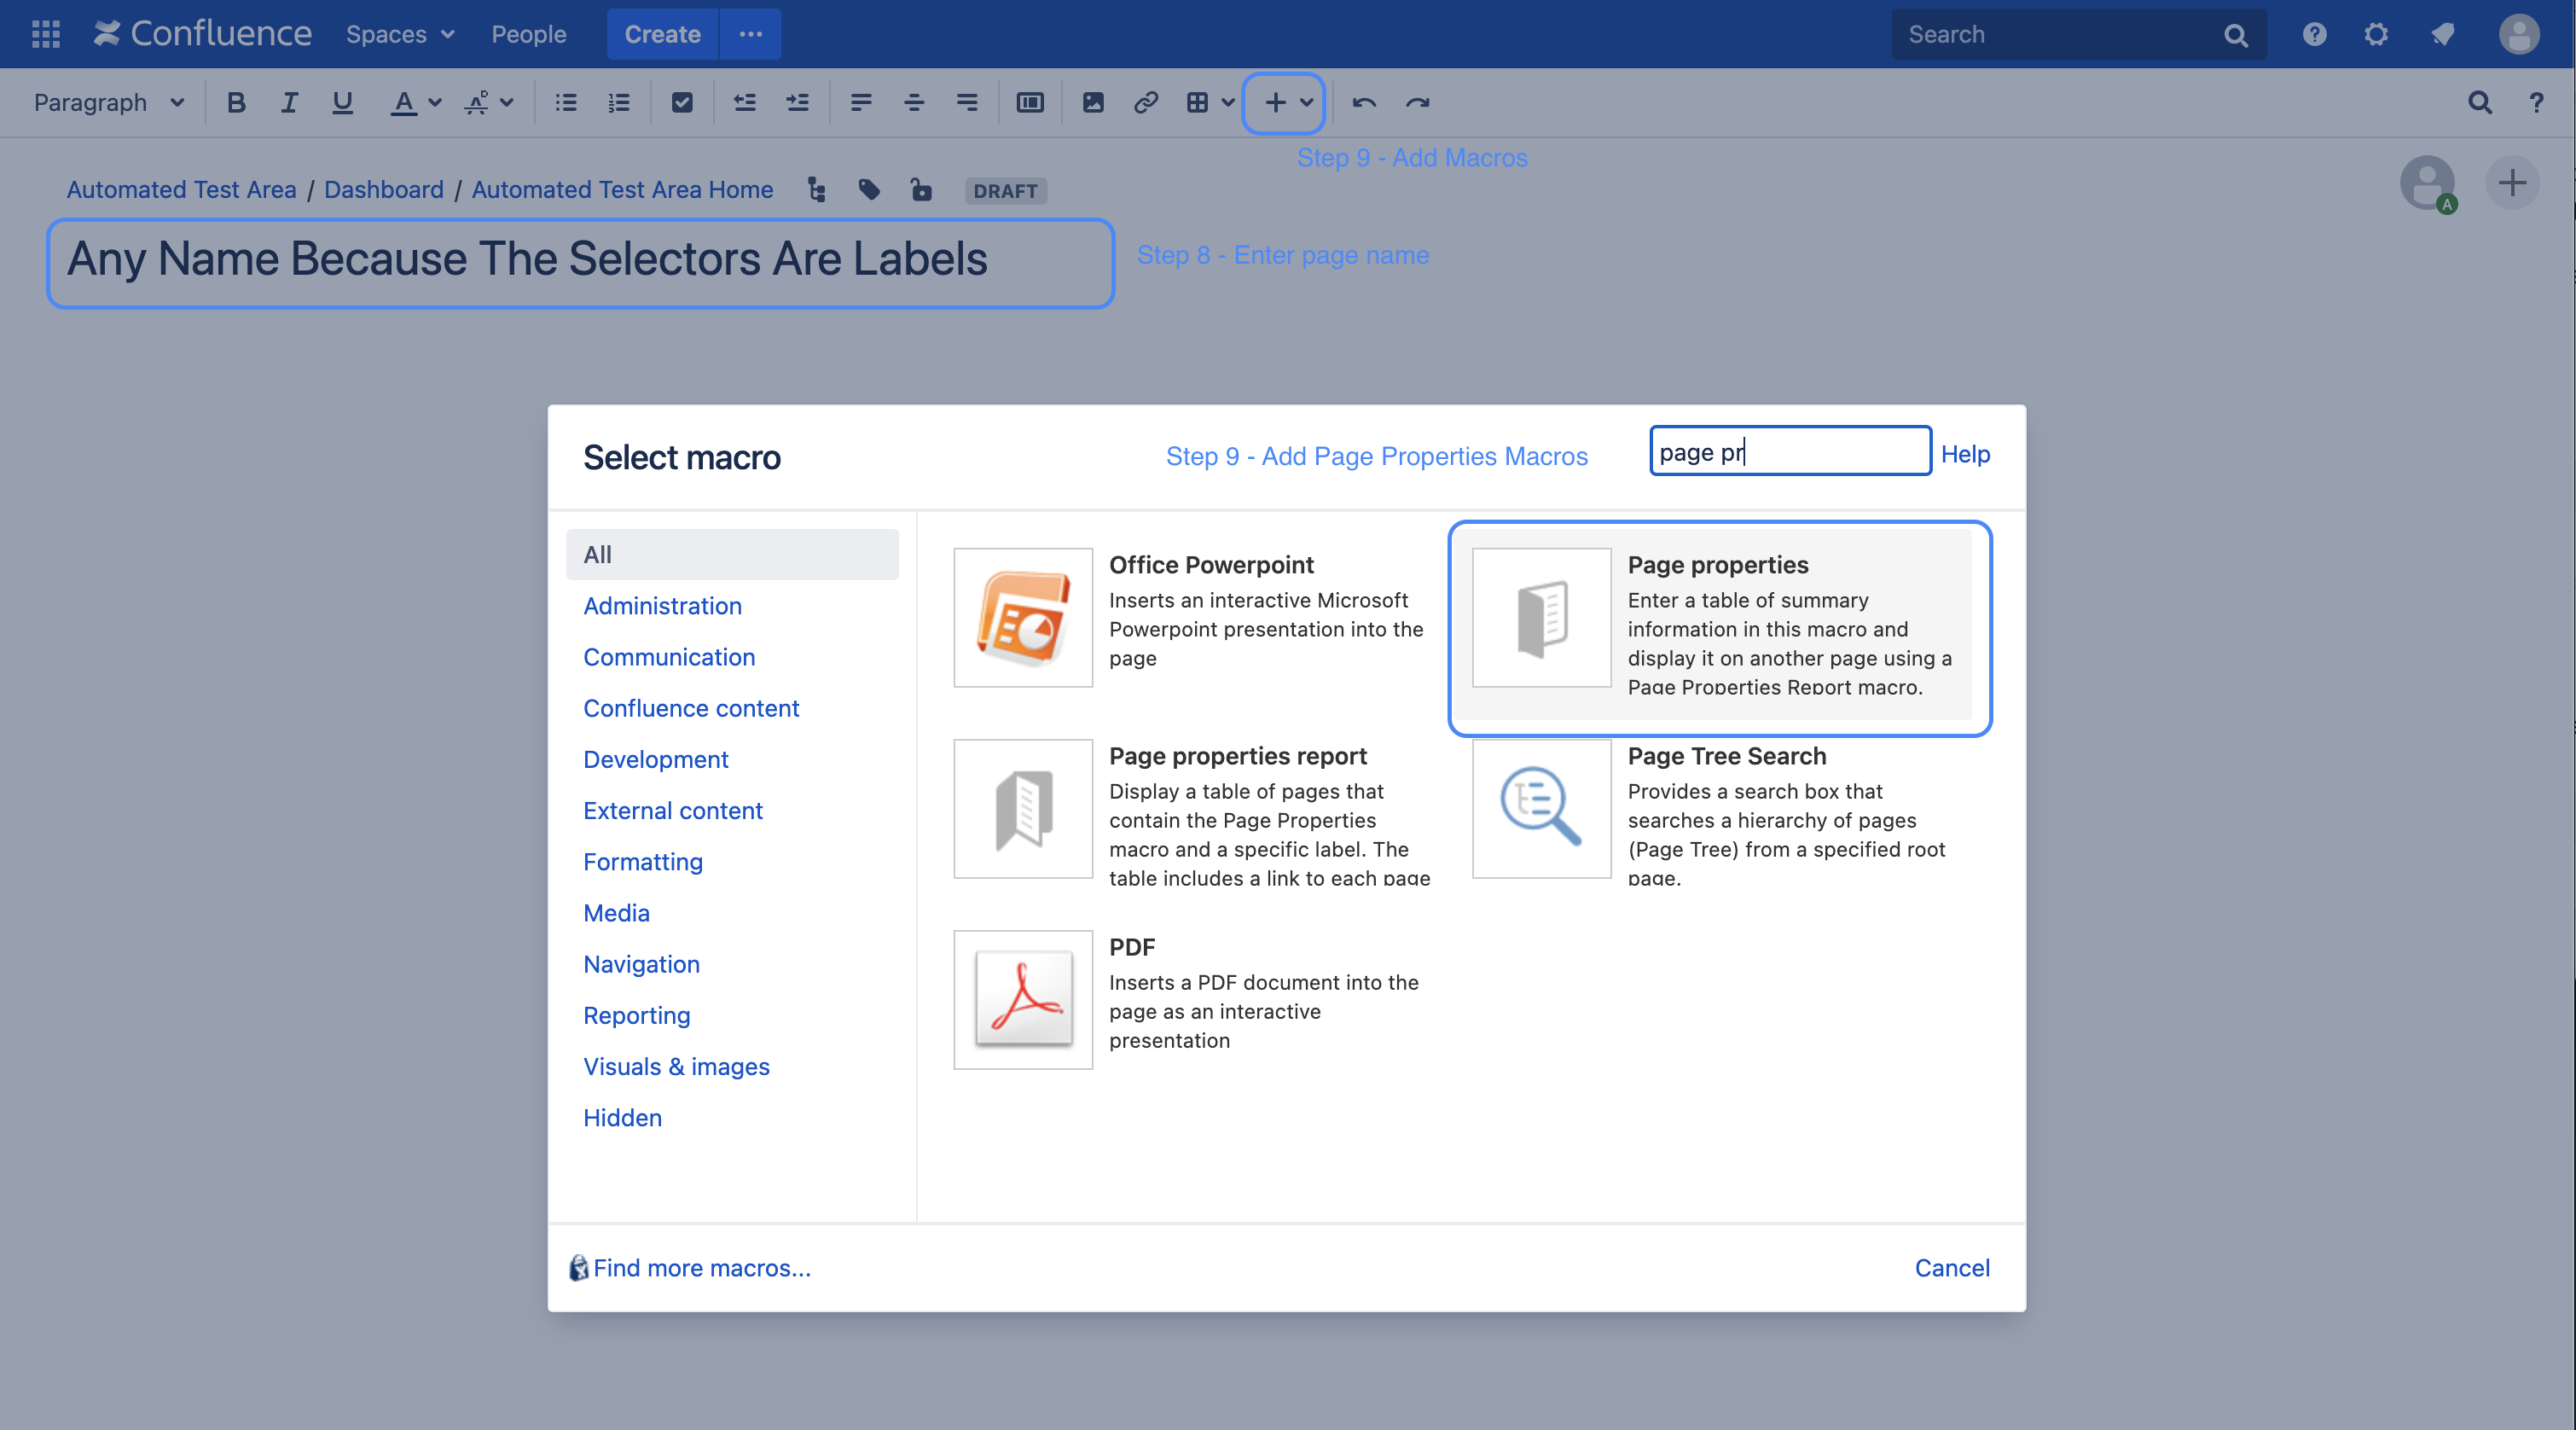 | Step 8: You can choose any page name, because the page selection in our example is done via labels only. Step 9: In order to evaluate the page properties, a Confluence page must also contain a page properties macro. Therefore the macro is added in this step |
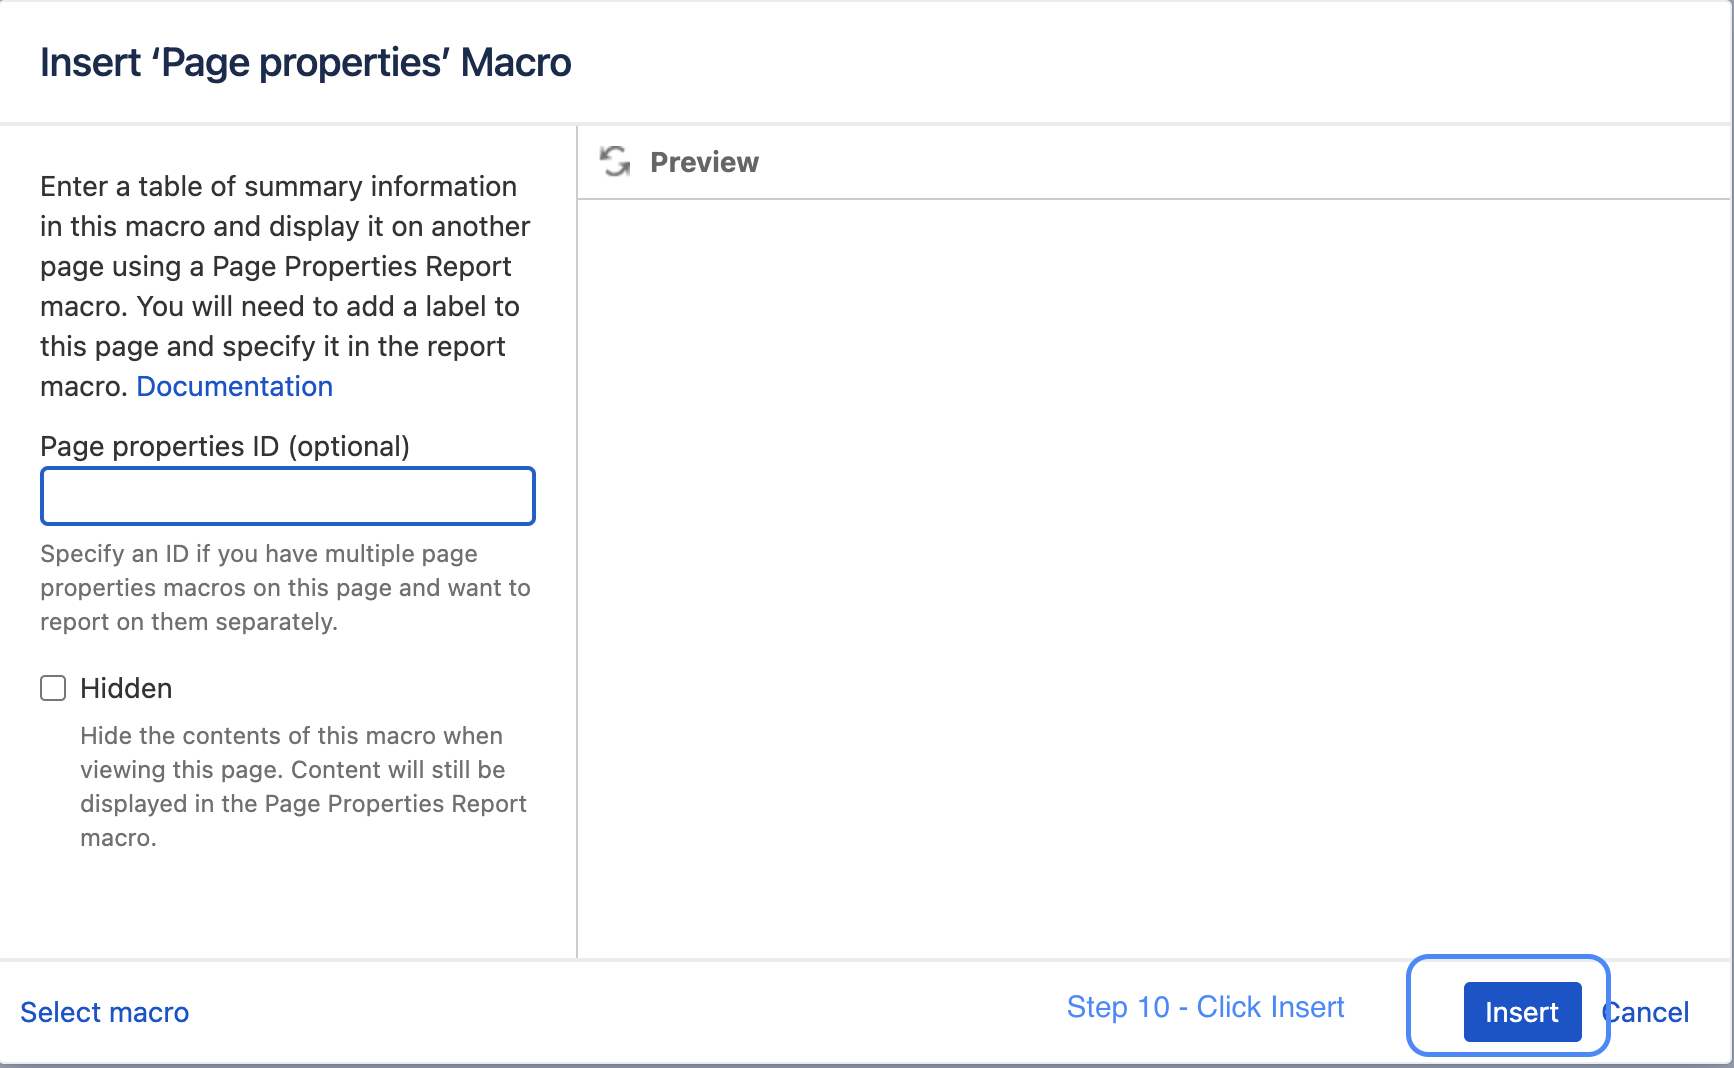 | Step 10: You do not necessarily have to enter further details with the macro - Just press insert |
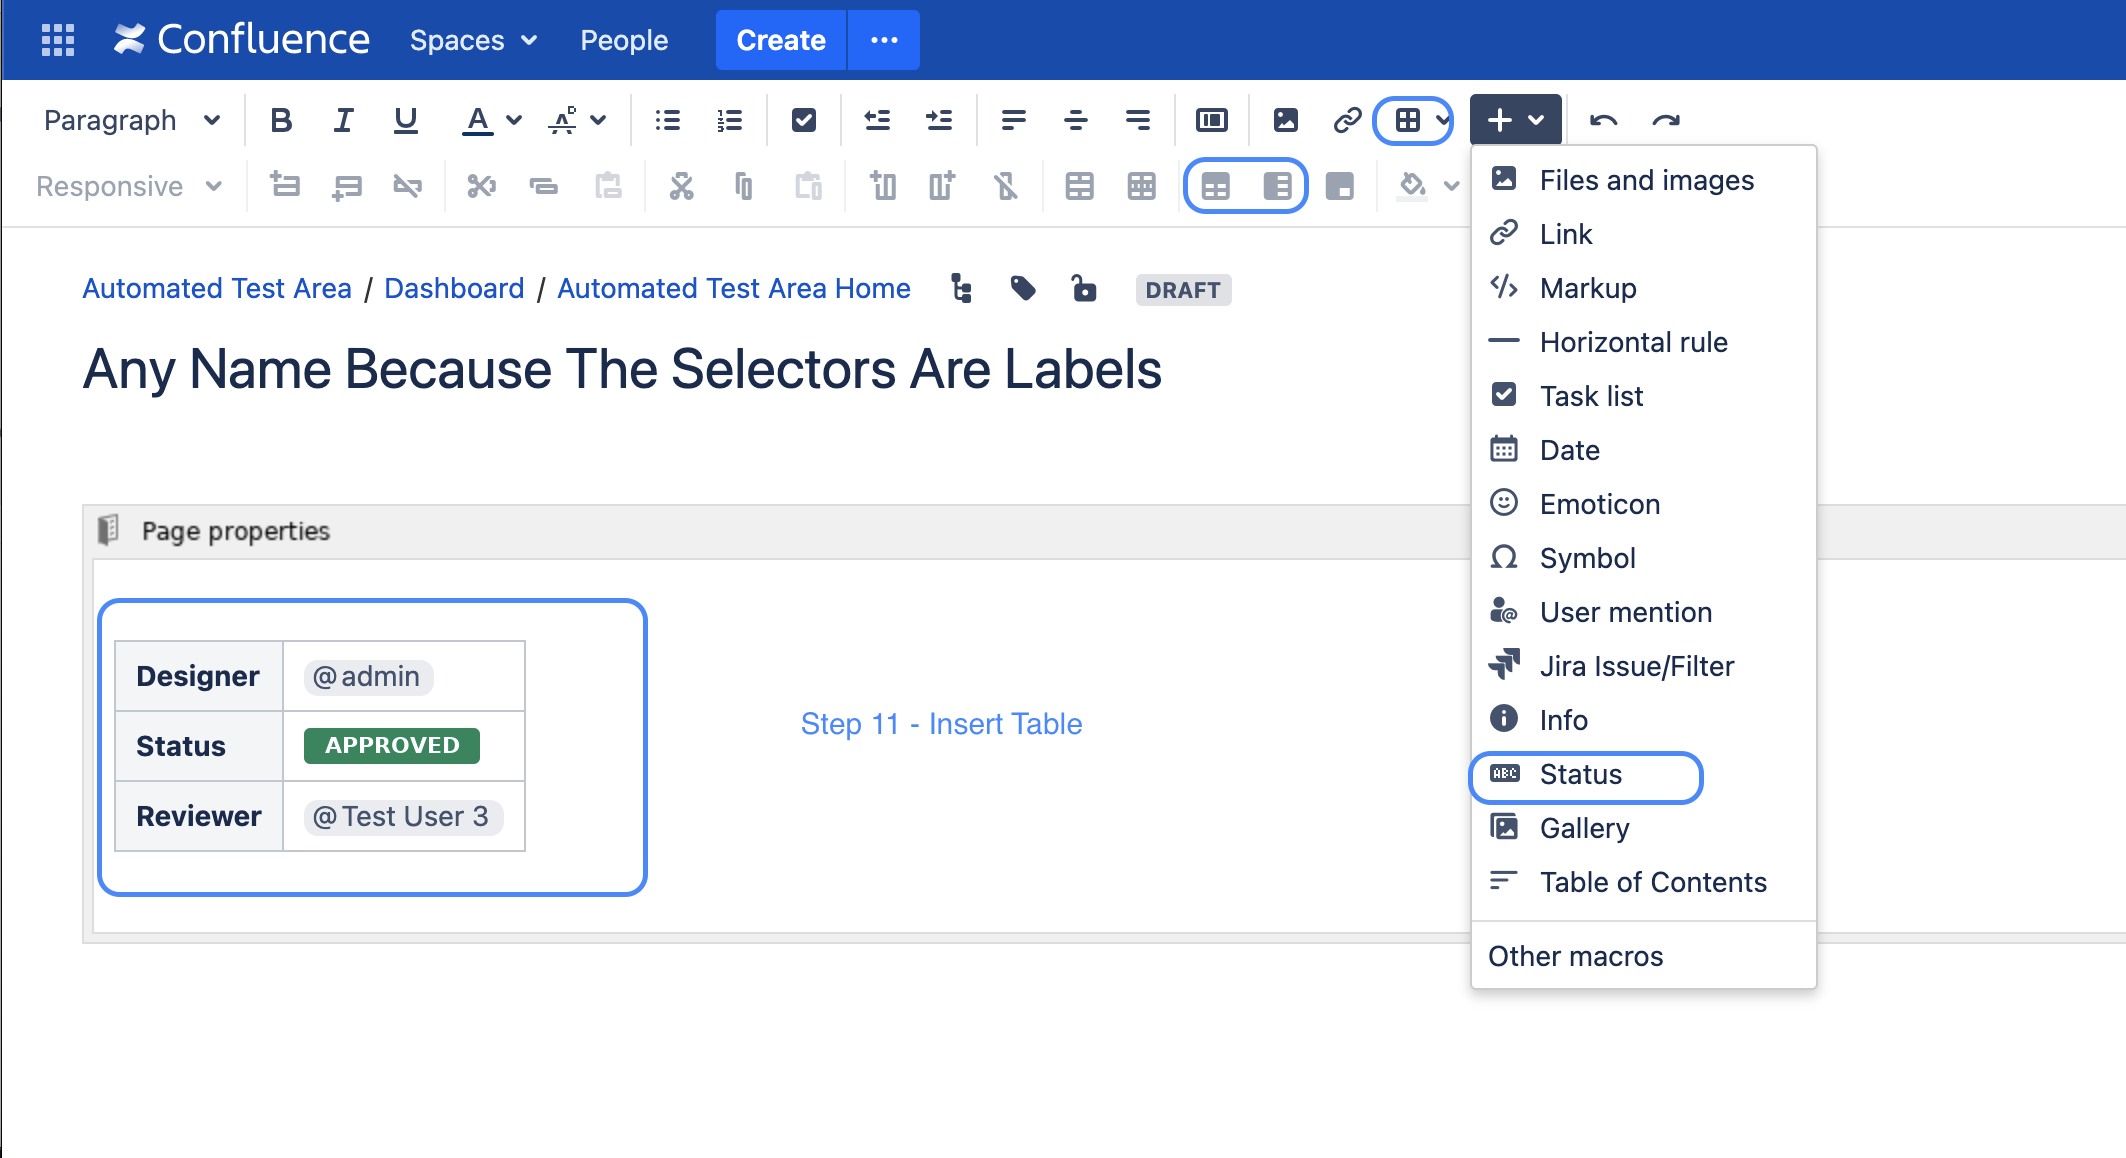 | Step 11: Now you can add a table to the Page Property macro that represents the keys and values of the page.
|
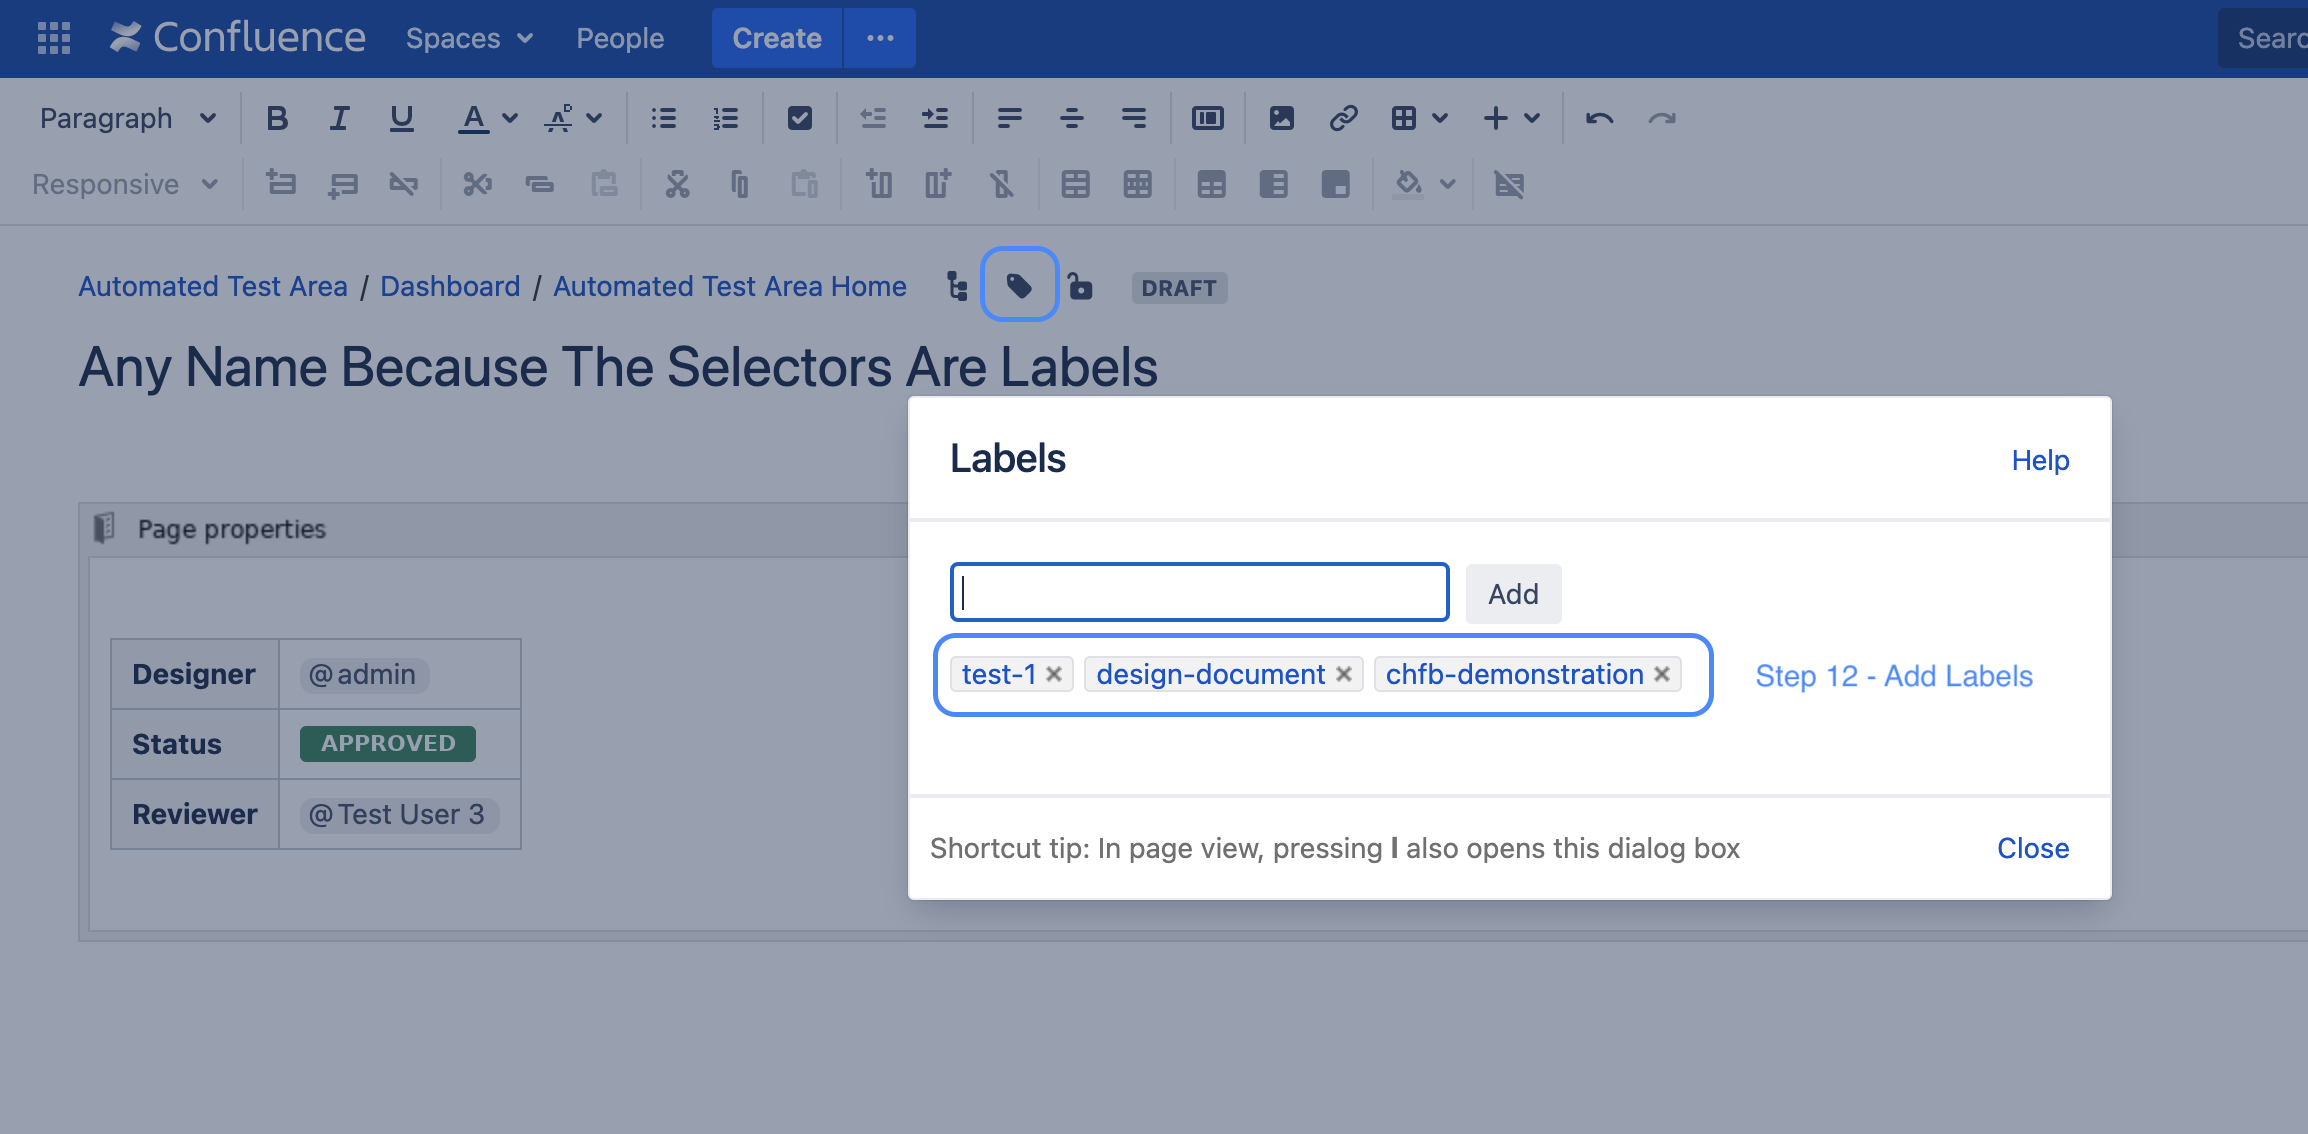 | Step 12: Because the page selection in our example is done via labels only, we have to add 3 labels to the page
CODE
|
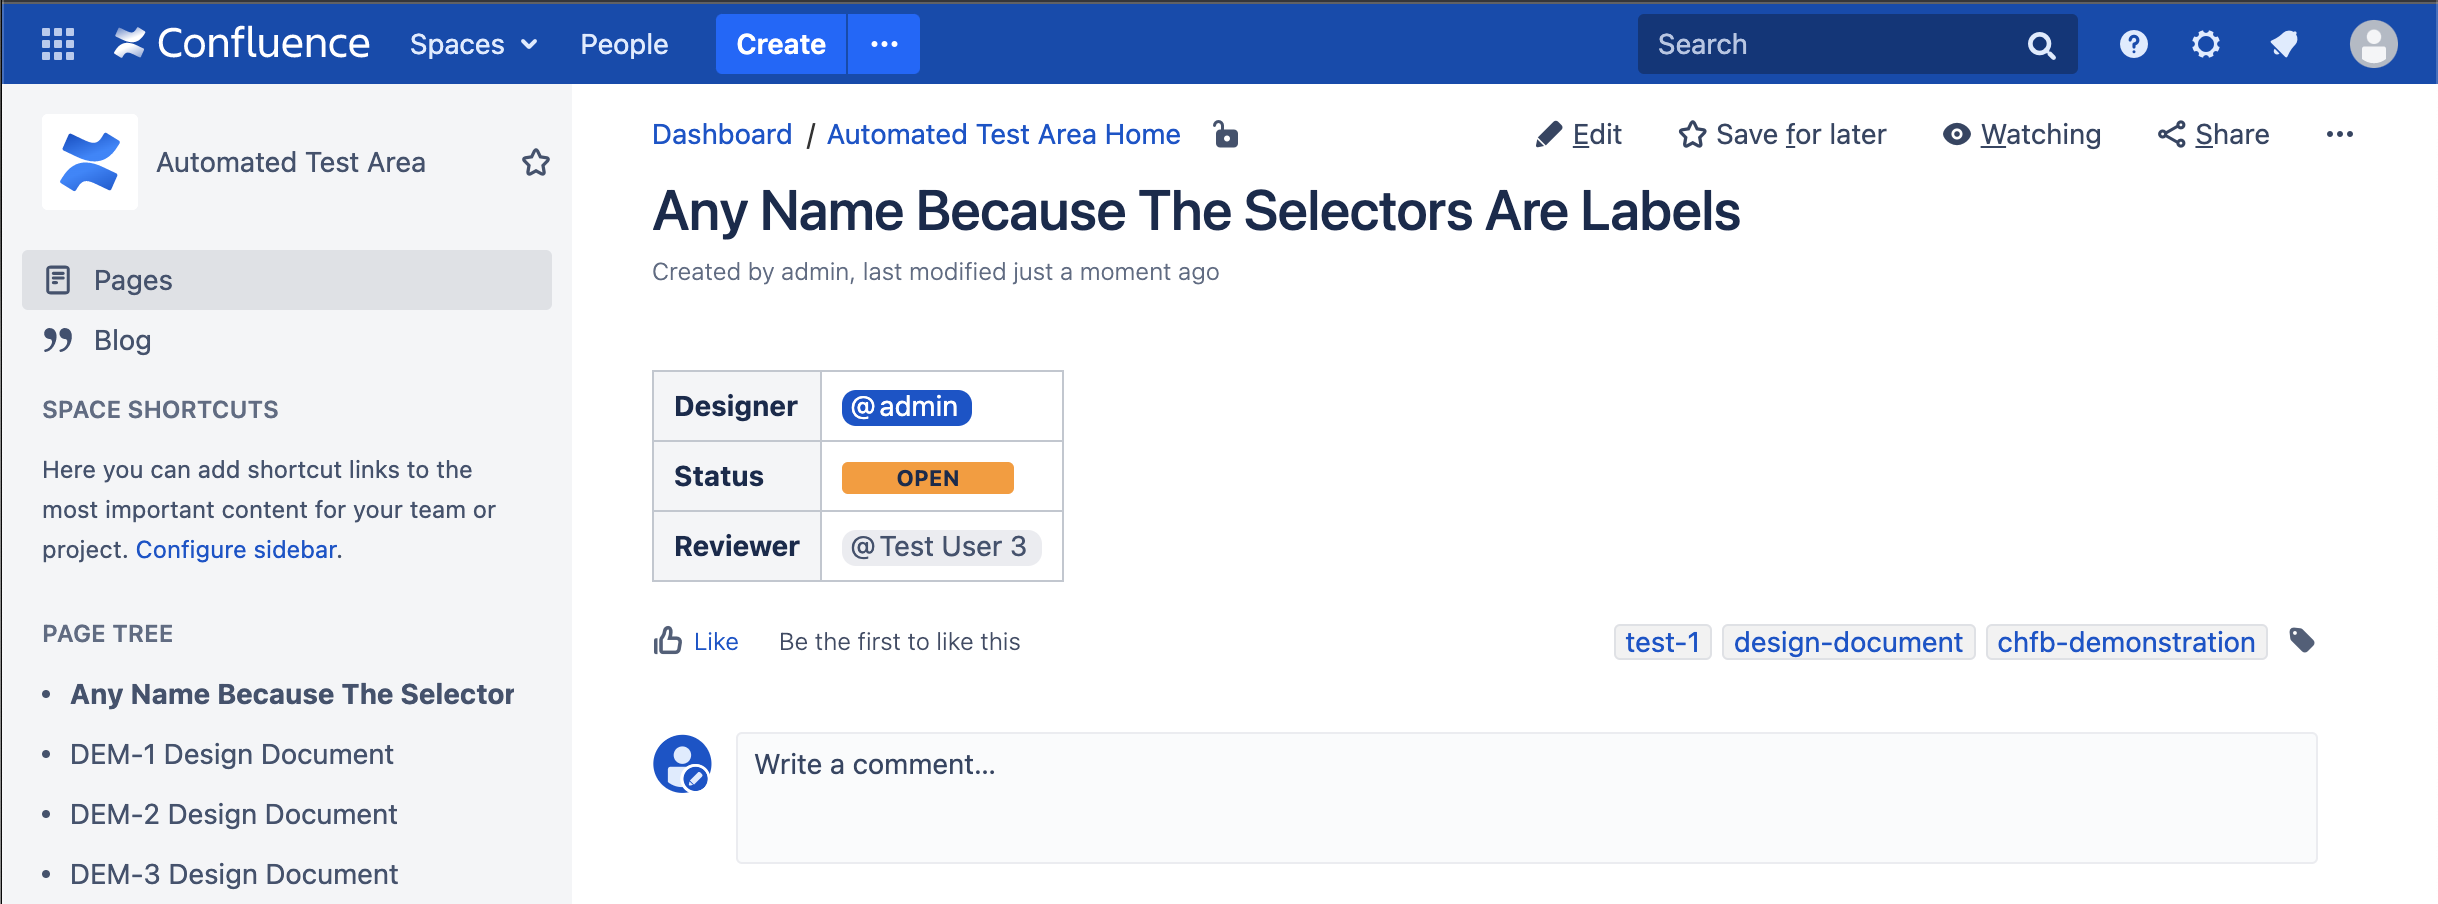
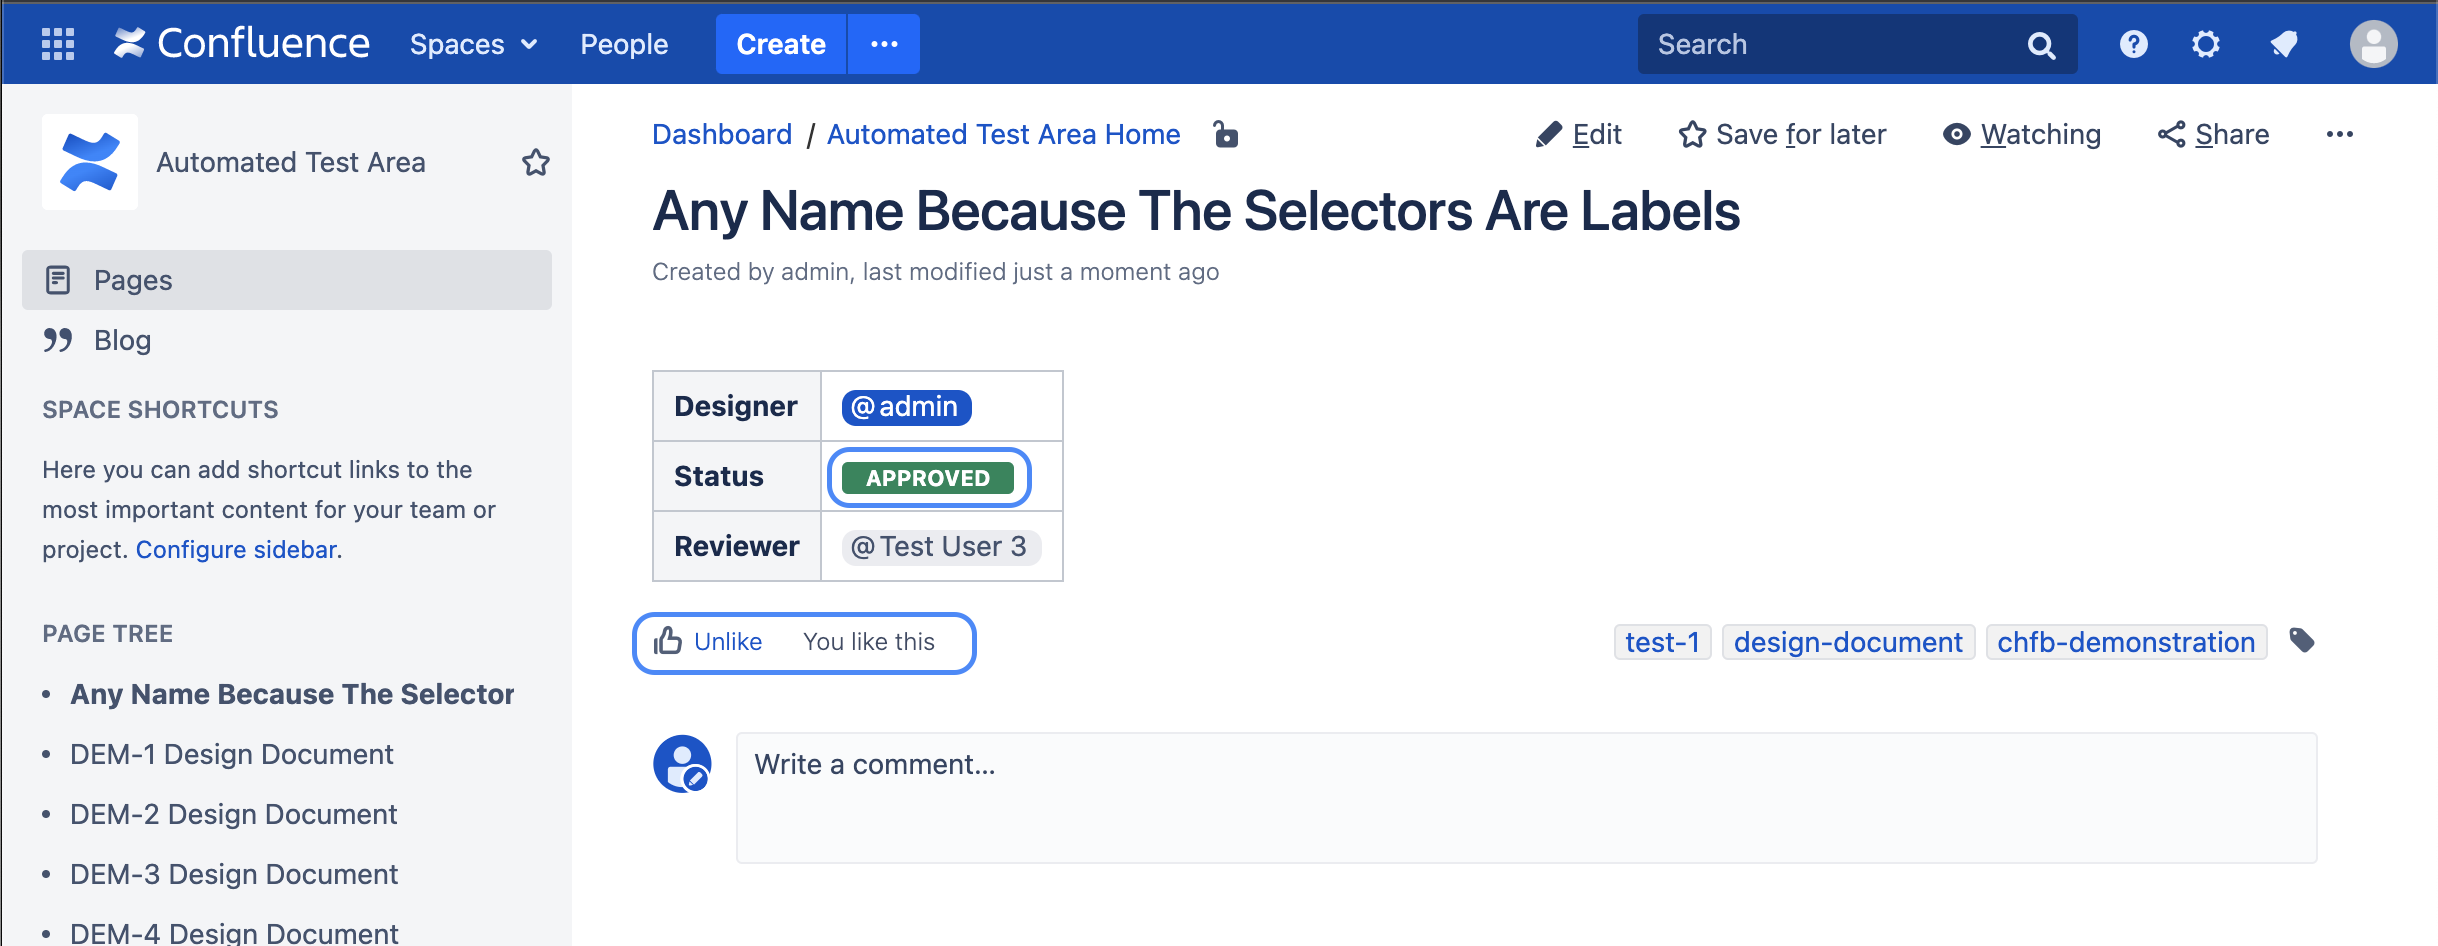
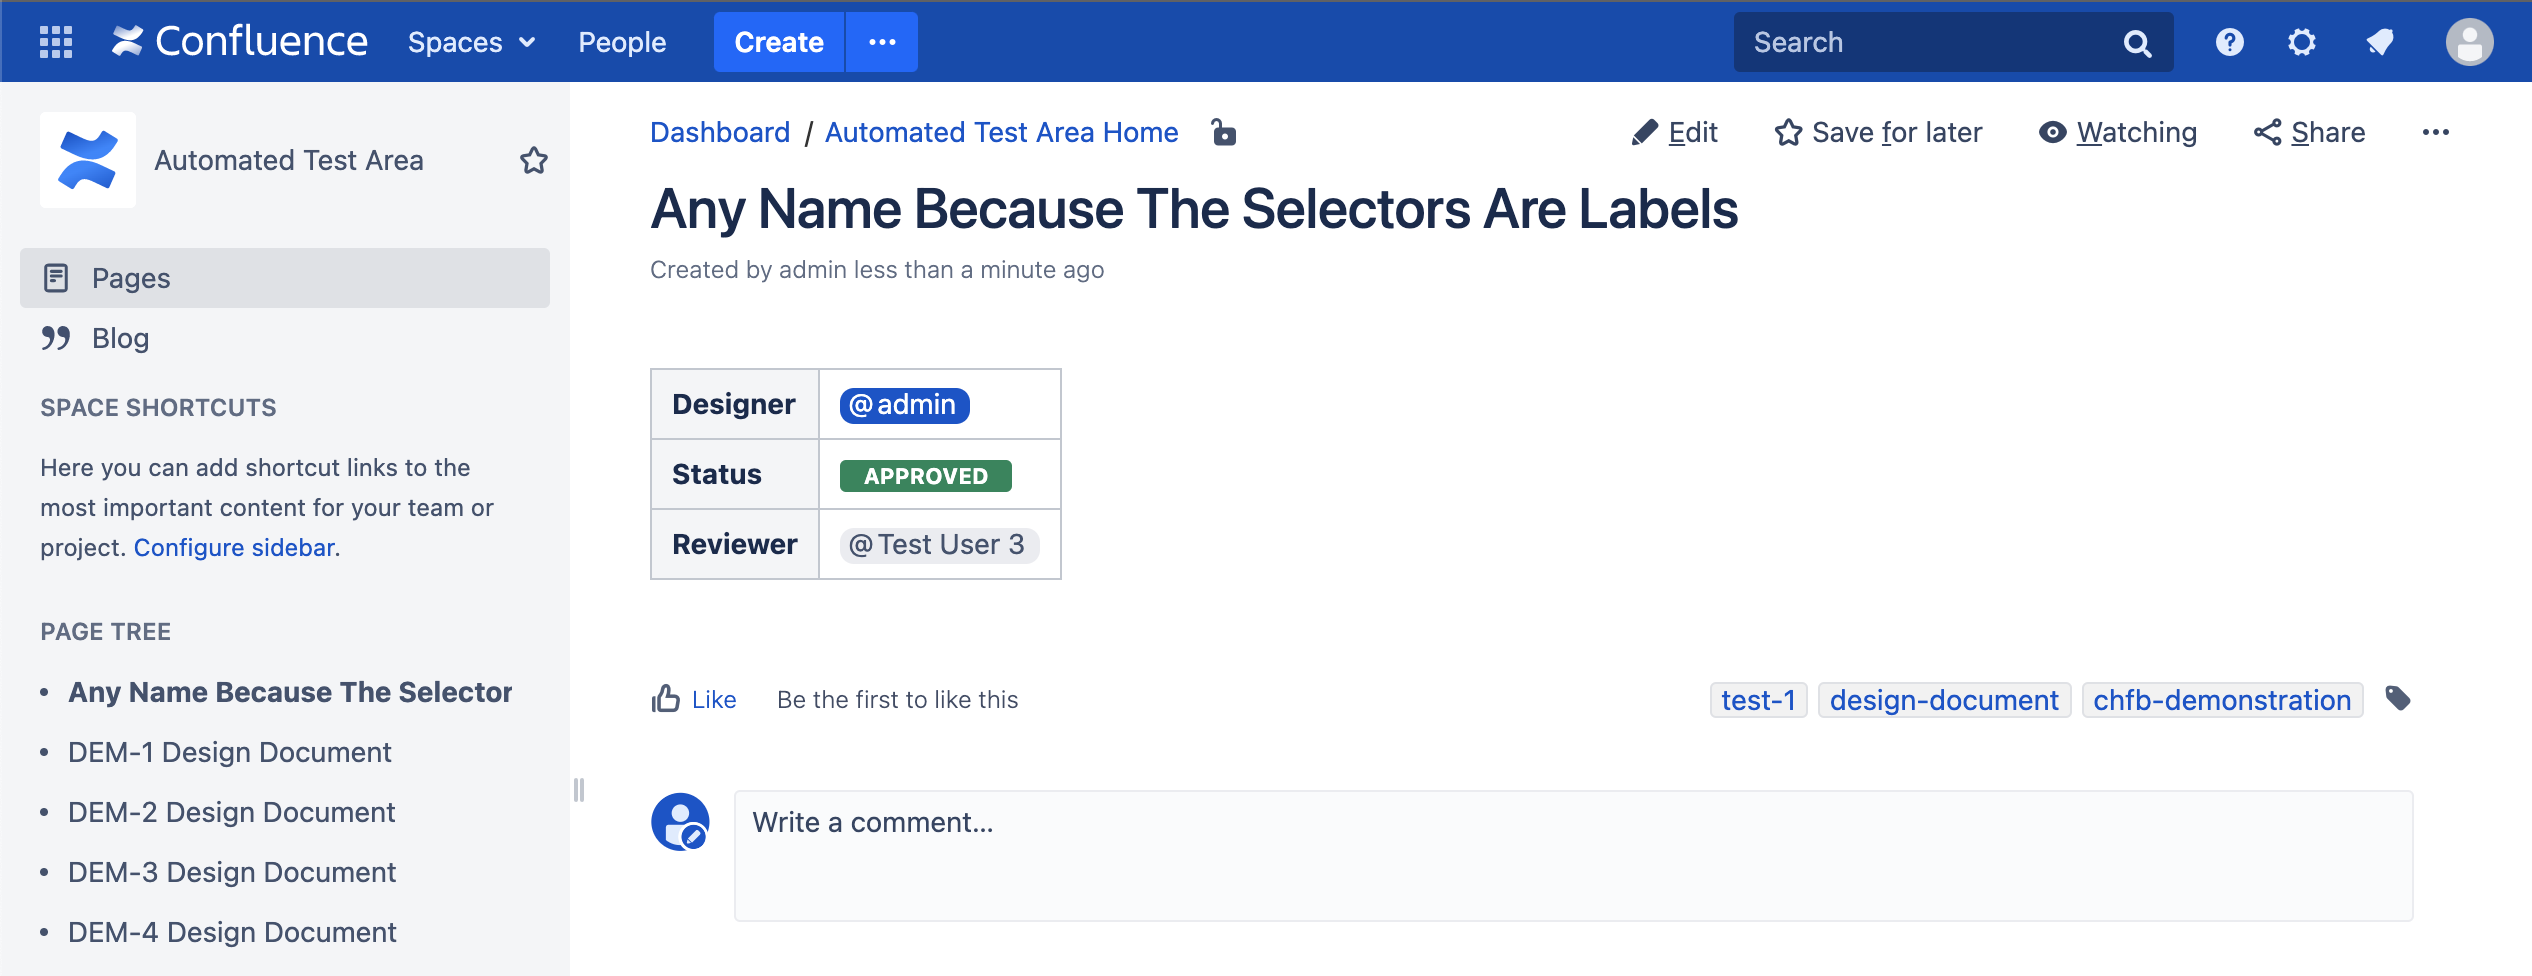 | The final page should be like this It is intended that the page will not get any likes yet |
Steps 13-20 - Git clone - commit - push
Now that we have created the hook and created a Confluence page for the test, we are ready to execute the test using Git commands. We will now clone the Git repository where we have configured the hook, make a change, commit the change with the issue key "TEST-1" and push it afterwards. Since the page has not received any likes yet, we expect the push to fail.
Execute the following commands (e.g. in your /tmp directory)
Step-13: Clone your git Repository
Clone repository
BASHgit clone http://admin@bitbucket-server/scm/project_1/rep_1.git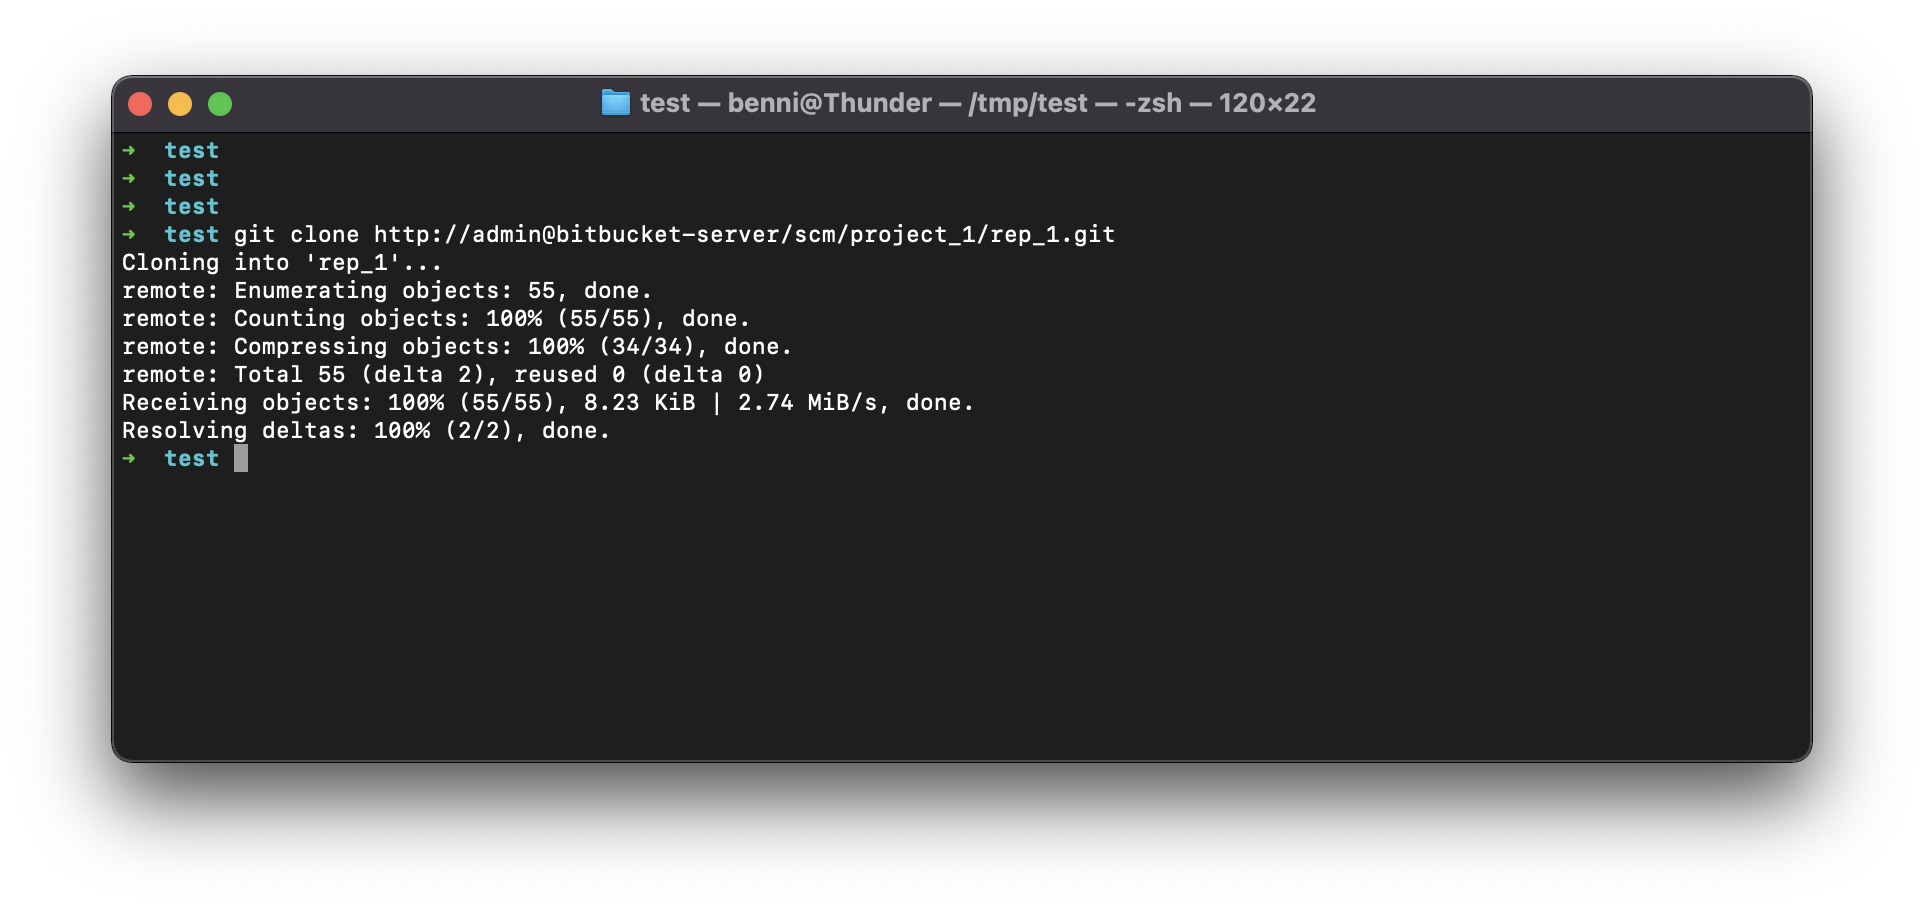
Step 14 - Got into the repository
Change directory
BASHcd rep_1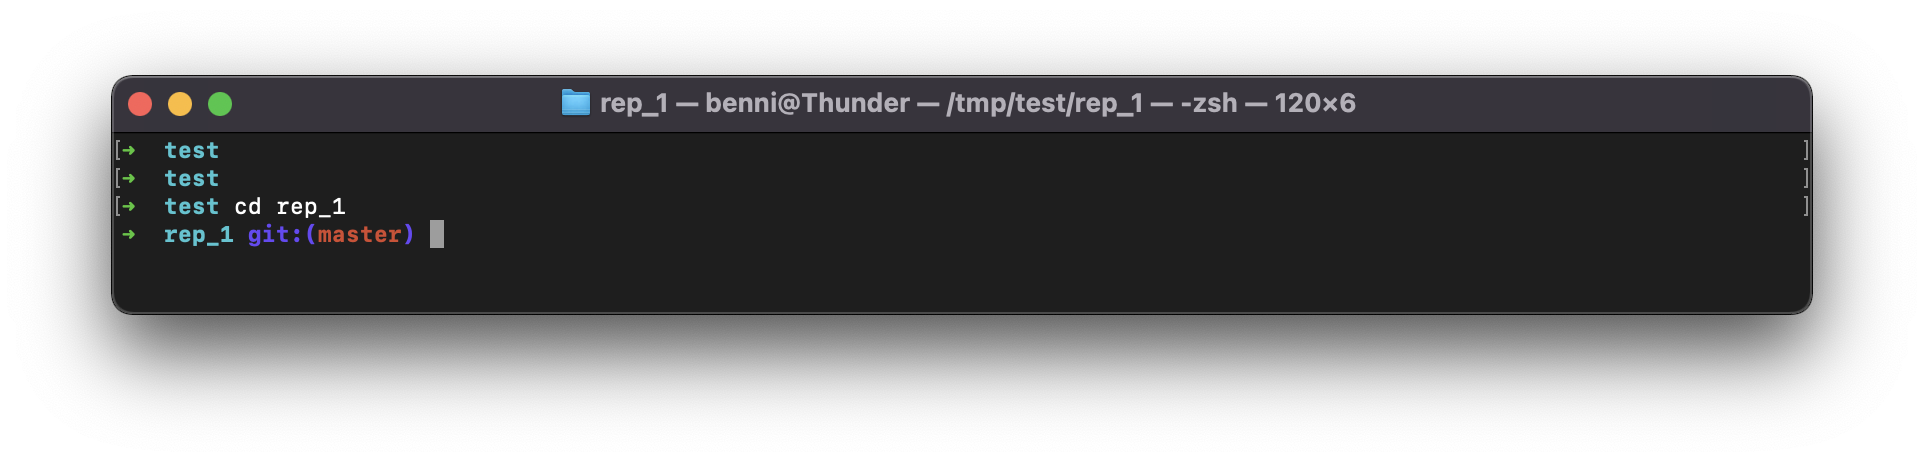
Step 15 - Create a file, add file, commit file with the issue key TEST-1
Modify file and commit the file
BASHecho "test-string" >> test1.txt git add test1.txt git commit -m "TEST-1 anything"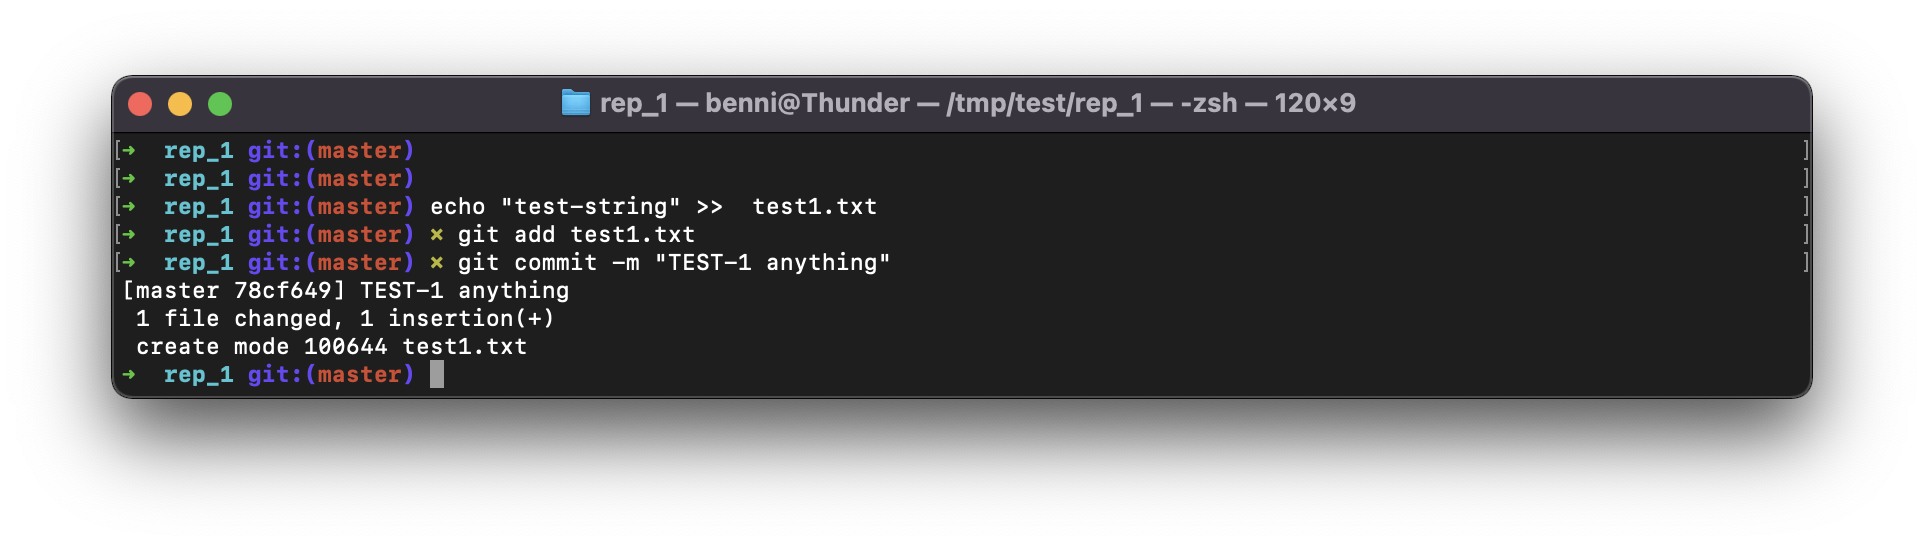
Step 16 - Push the changes
Git push
BASHgit push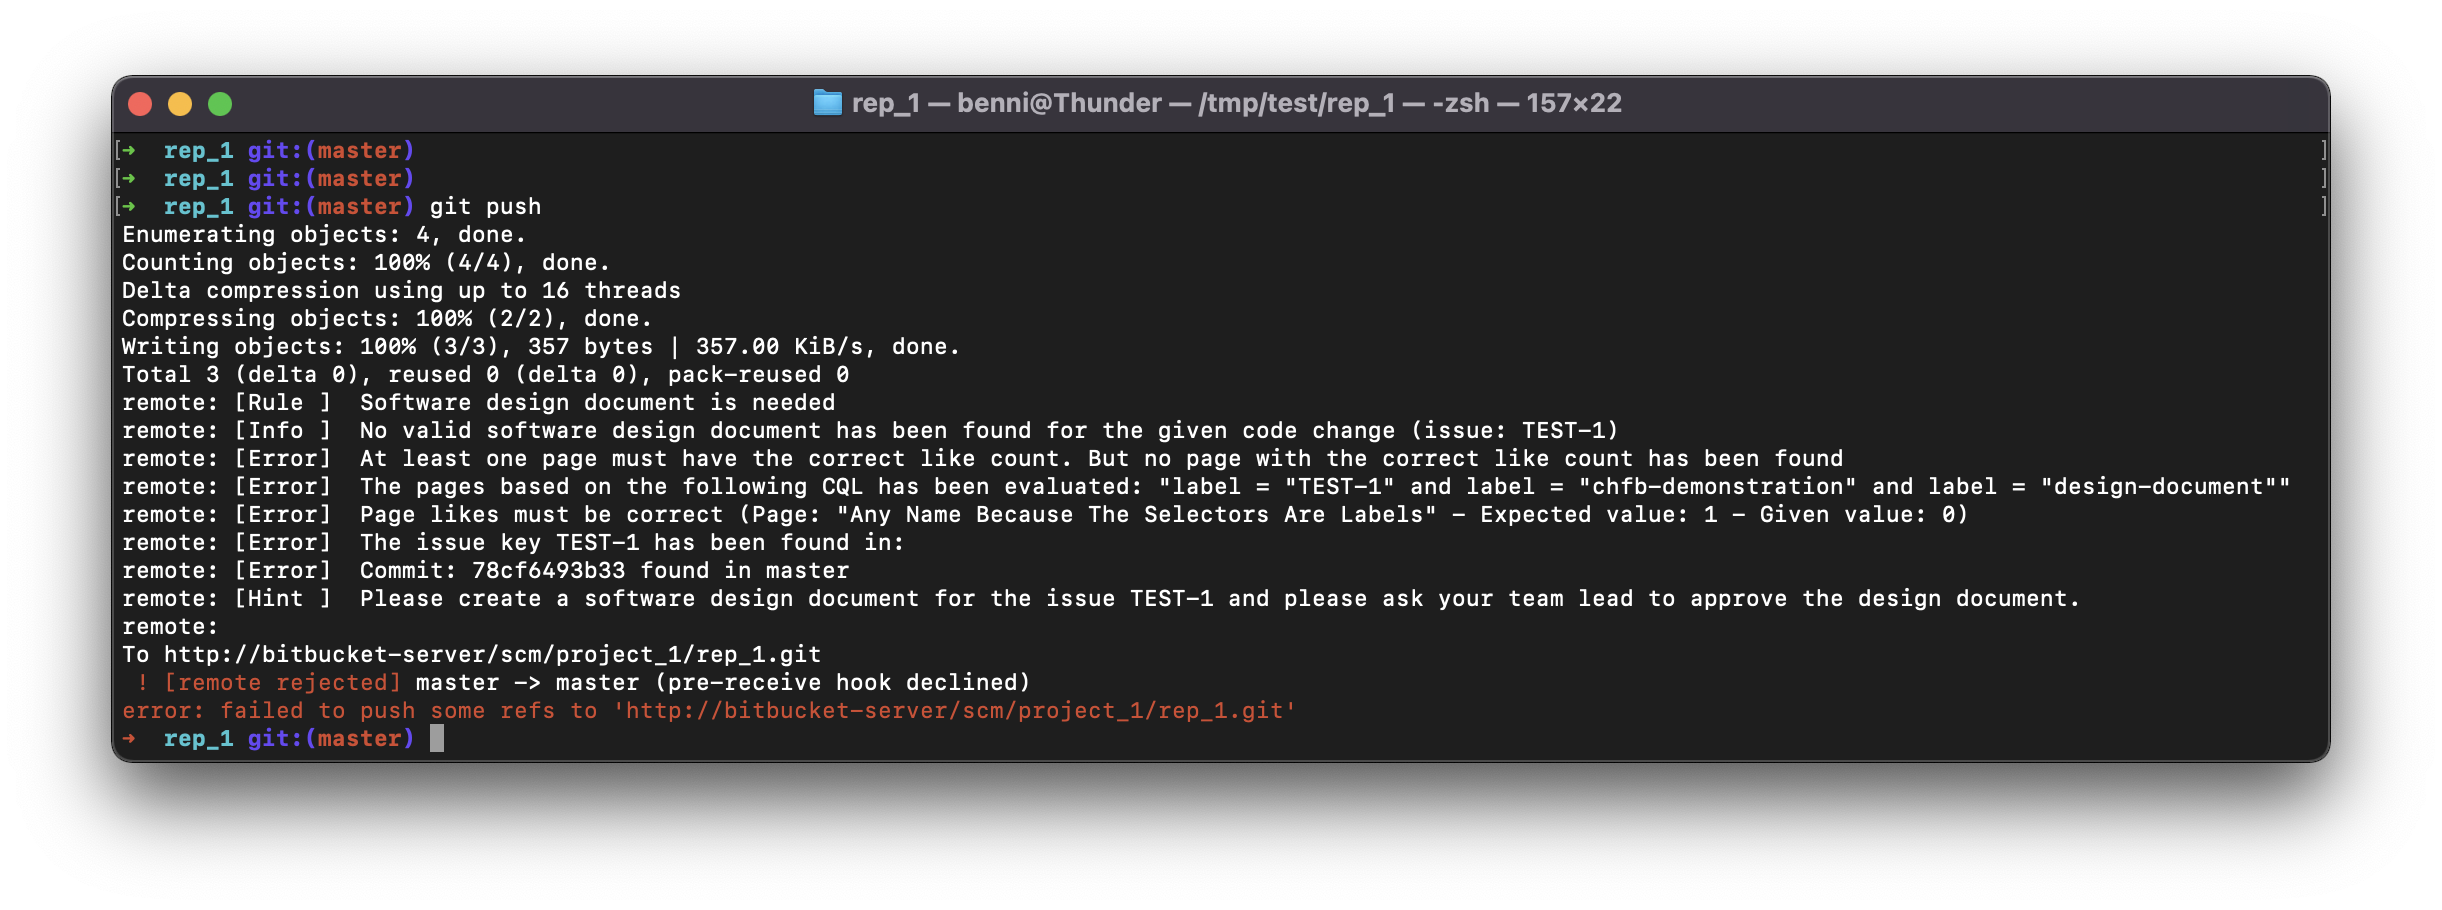
As you can see, the change could not be pushed. The correct page was selected based on our CQL, the status and reviewer were successfully evaluated, but no like could be found.
Step 17 - Edit the Confluence page - set the status of the page to OPEN
Now the push should fail because the status of the document does not match APPROVED and the page still has no likes.
Step 18 - Push again
Git push
BASHgit push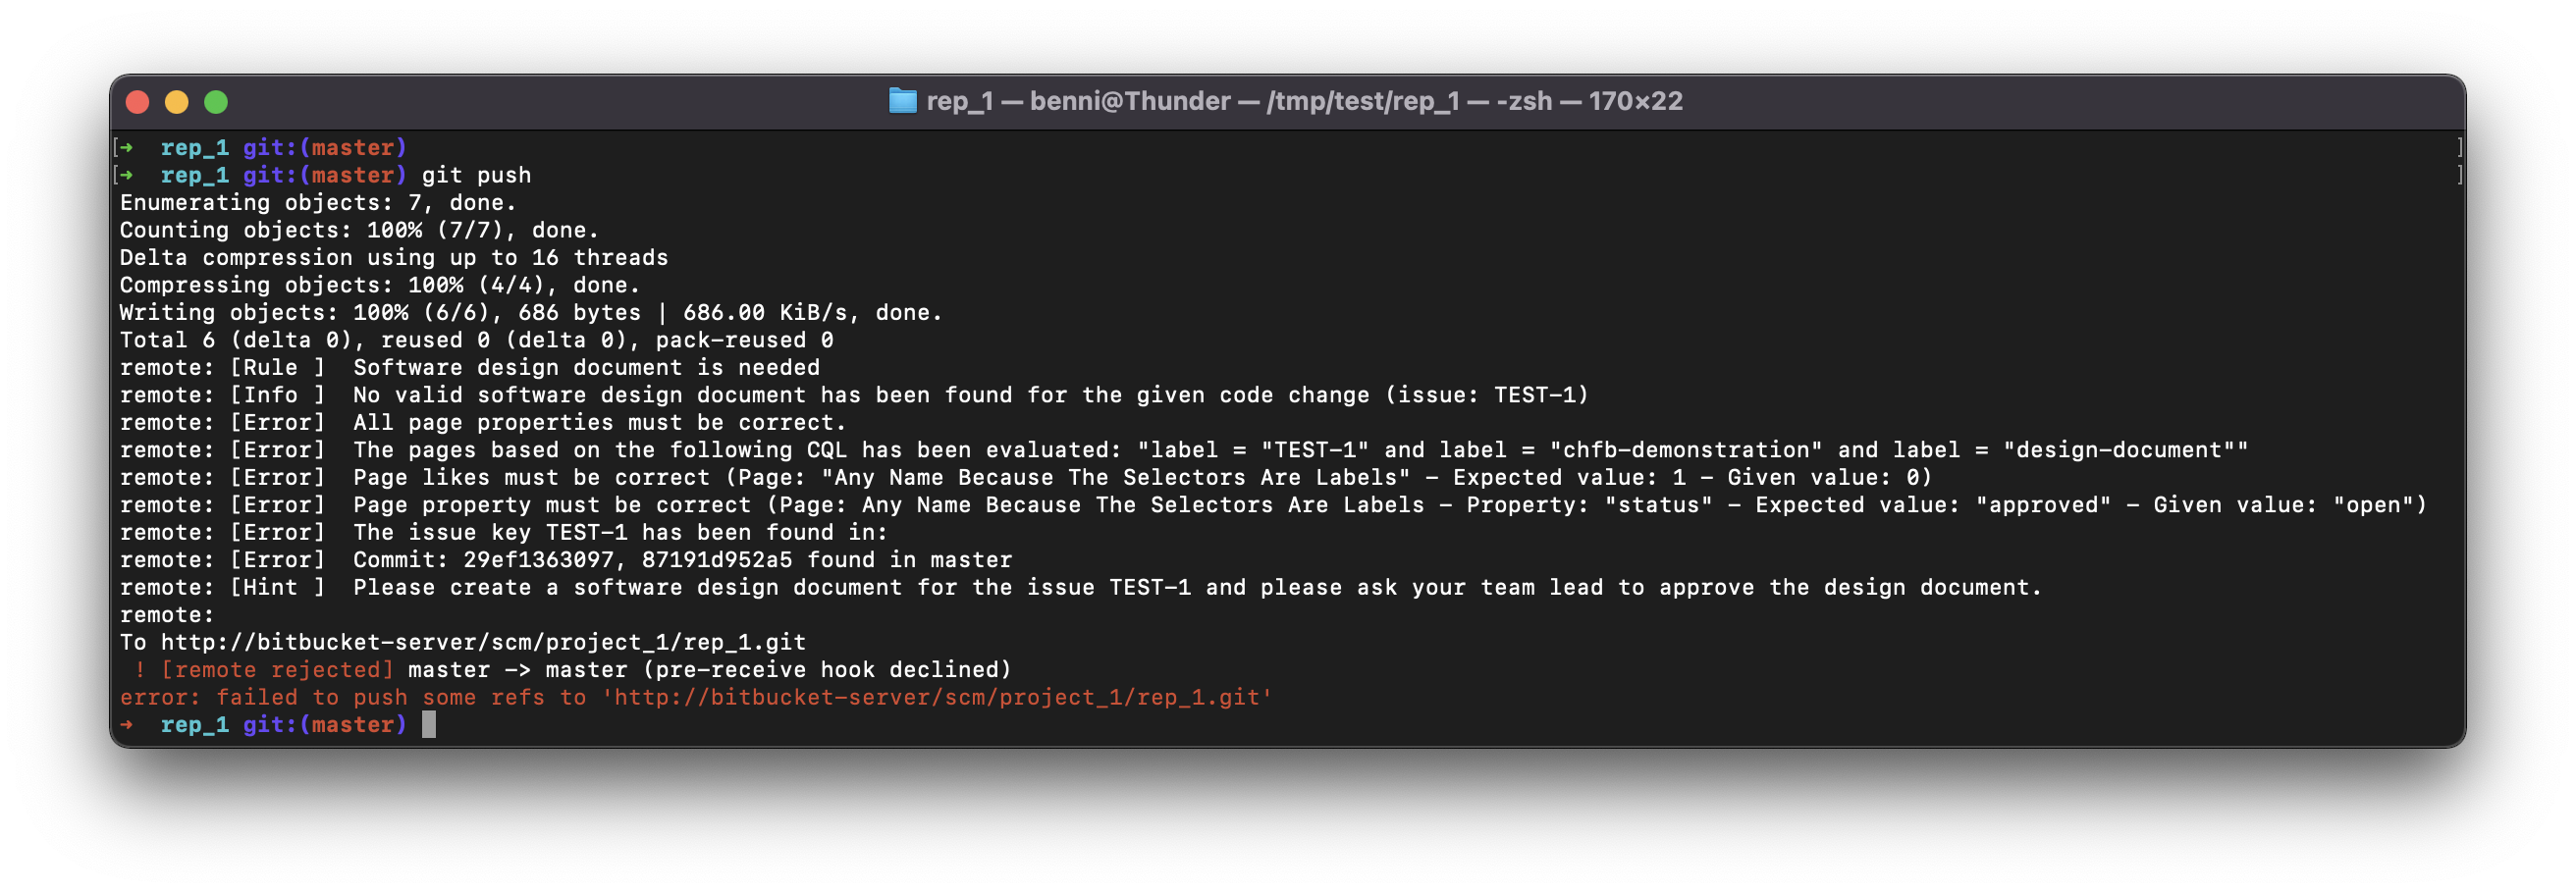
As you can see, the change could not be pushed. Because of the wrong status and the missing like
Step 18 - Lets change the Confluence page again (Add a like and set the correct status)
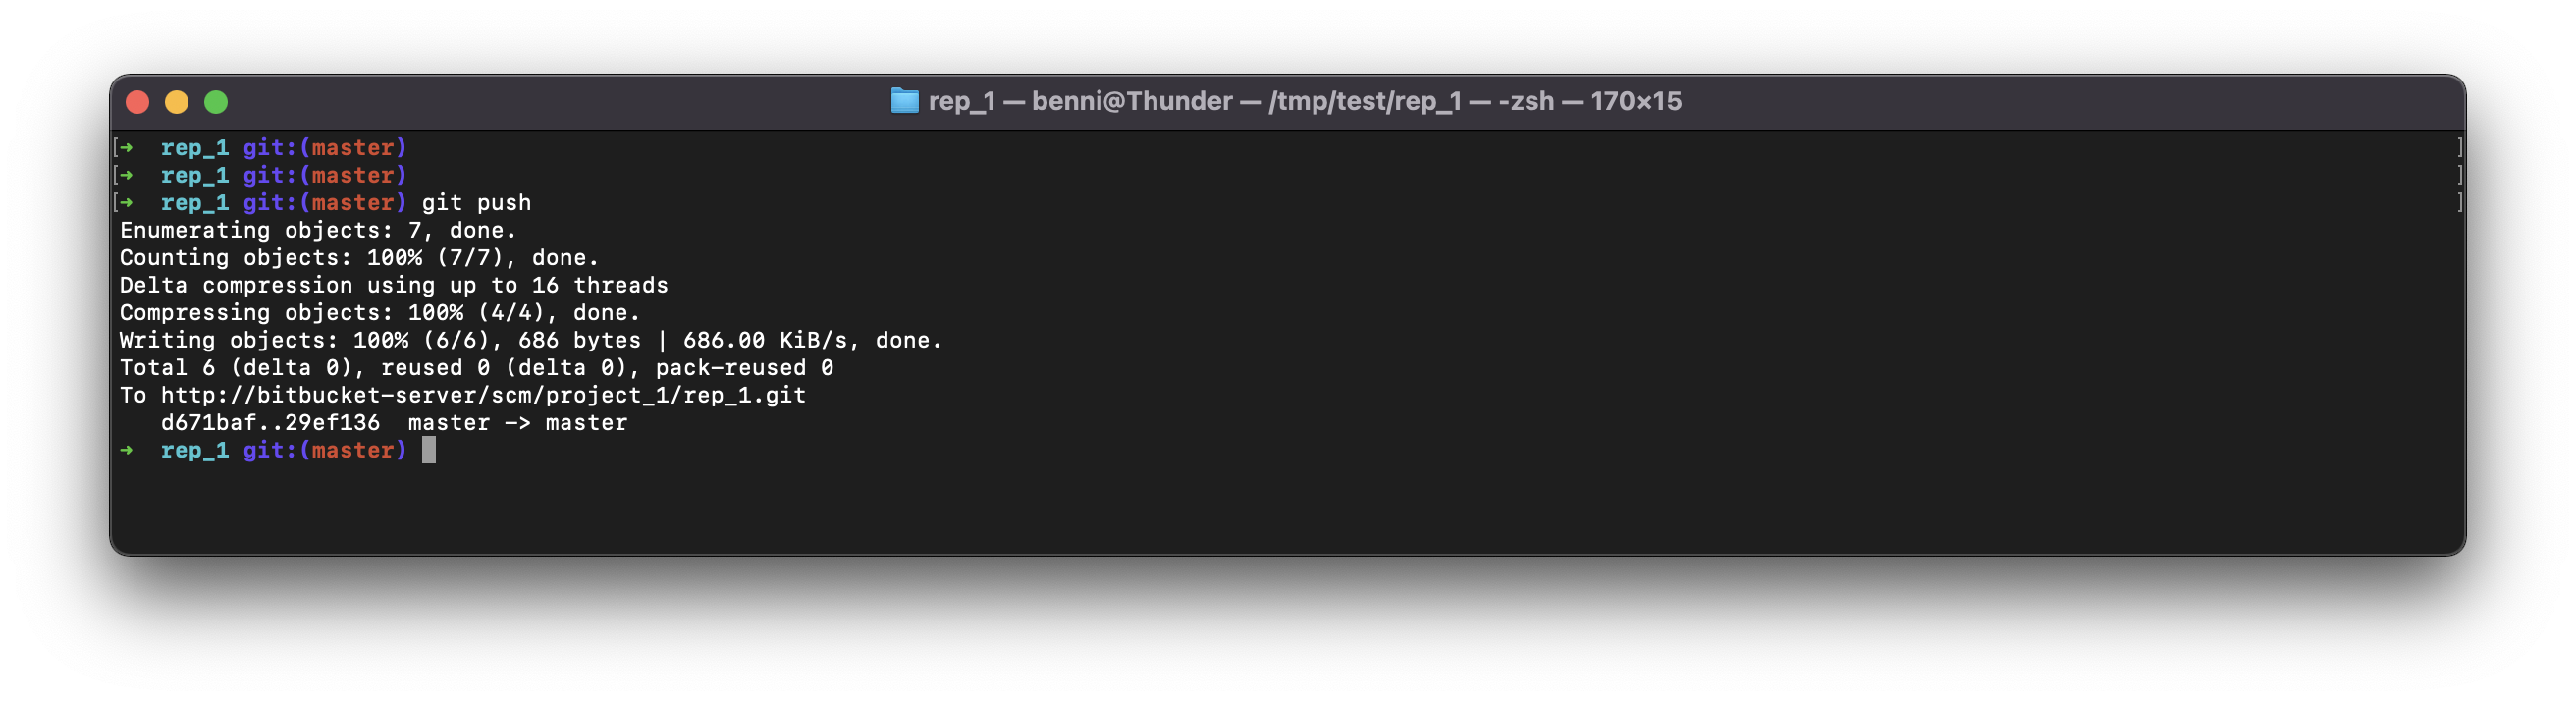
Step 19 - PUSH AGAIN
Now the push works...
Last Step
It would be super helpful if you could give us feedback. We are constantly trying to make our products even better and for that we need your feedback. Please leave us a message in our service desk