A Jira connection establishes the link between the add-on and a Jira instance. It is required to access and validate Jira issues that are referenced in branches, commits, or pull requests. Without a configured Jira connection, the system cannot resolve issue keys or perform checks such as issue key validation or JQL-based validation.
Jira connections can only be created and managed at the workspace level, and can then be enabled or disabled per repository as needed.
Important notes
This app is not eligible for the Runs on Atlassian program because it communicates with an external system. In this case, the external system is Jira. No information is exchanged with unrelated third-party systems as part of this integration.
User an Access Token for Jira Communication
Before you configure a Jira connection, first set up a dedicated technical user account that will be used for all communication with Jira. Then generate a personal API token, not a scoped token, for this technical user in its Atlassian account settings. Keep the personal API token available for the connection setup. All requests to Jira are executed in the account of this technical user.
For automation, use a dedicated technical account instead of a personal user account. We recommend that this account:
-
is not linked to a real person
-
has only the permissions required for the integration (e.g Browse Permission)
-
is used exclusively for technical automation processes
→ Tokens can be created here: https://id.atlassian.com/manage-profile/security/api-tokens.
→ For more information see the official Atlassian documentation for detailed steps: https://support.atlassian.com/atlassian-account/docs/manage-api-tokens-for-your-atlassian-account/ .
Currently, Jira requests cannot be executed with the permissions of the individual user who triggers the evaluation, as this is not yet supported by the Atlassian API. Therefore, a central technical user must be configured, and all communication with Jira is performed on behalf of this user.
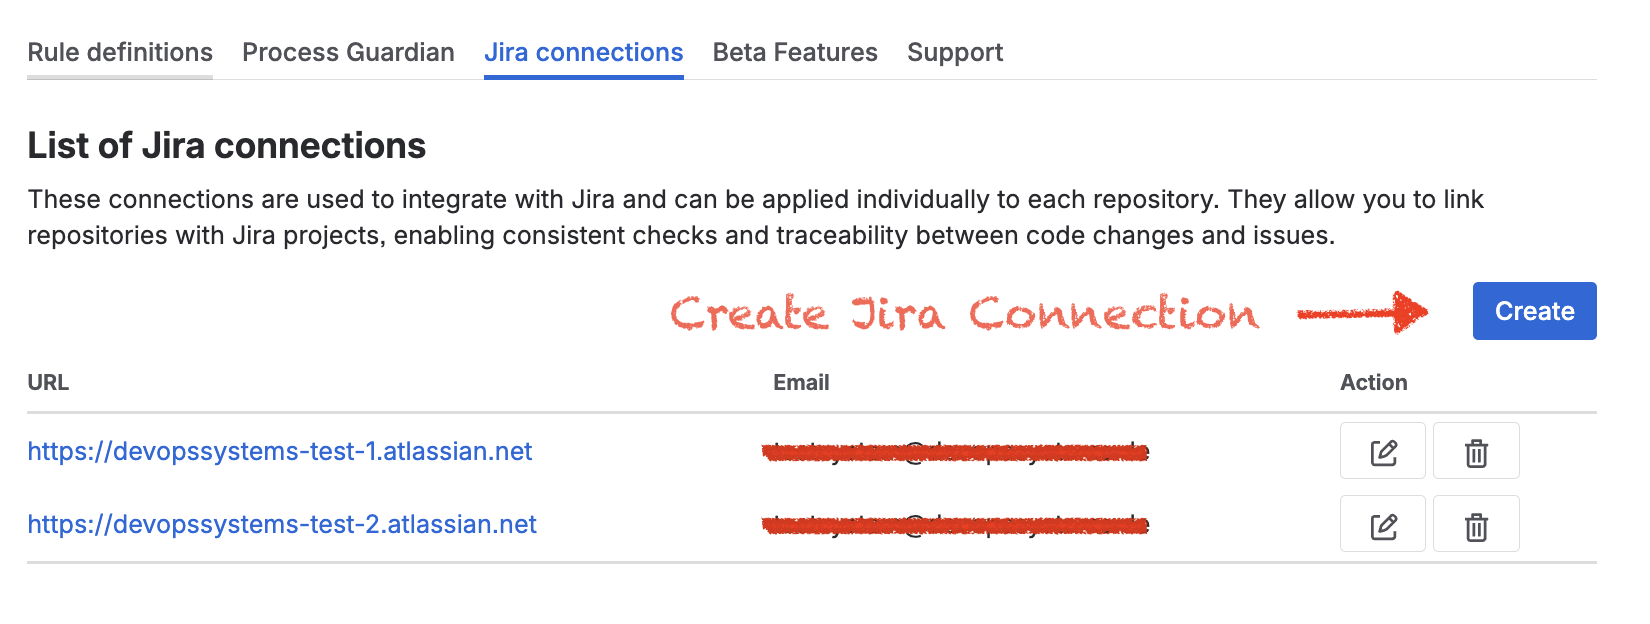
Create a Jira connection
The Jira connections tab in the workspace settings is used to create and manage Jira connections. When you select Create new connection, a dialog opens where you enter the required connection details.
Where can I find the settings?
-
Workspace Settings → Forge → Jira Hooks for Bitbucket → Jira connections
-
Repository Settings → Forge → Jira Hooks for Bitbucket → Jira connections
Required information
|
Field |
Description |
|---|---|
|
|
The email address used for the Atlassian account. |
|
Account ID |
The Atlassian account ID used for the technical user. |
|
Jira URL |
The base URL of the Jira instance that should be connected. |
|
API token |
The API token generated for the Atlassian account. |
Account ID
The Account ID is required because the app stores limited personal data within the Atlassian infrastructure to enable communication between Bitbucket and Jira. Reason: At the moment, Atlassian does not provide a fully reliable built-in mechanism for this communication. According to Atlassian requirements, whenever an app stores personal data, it must report the Account ID of the user whose data is stored. Therefore, the Account ID is needed for compliance with Atlassian platform policies. See also: Where can I get my Account-ID?
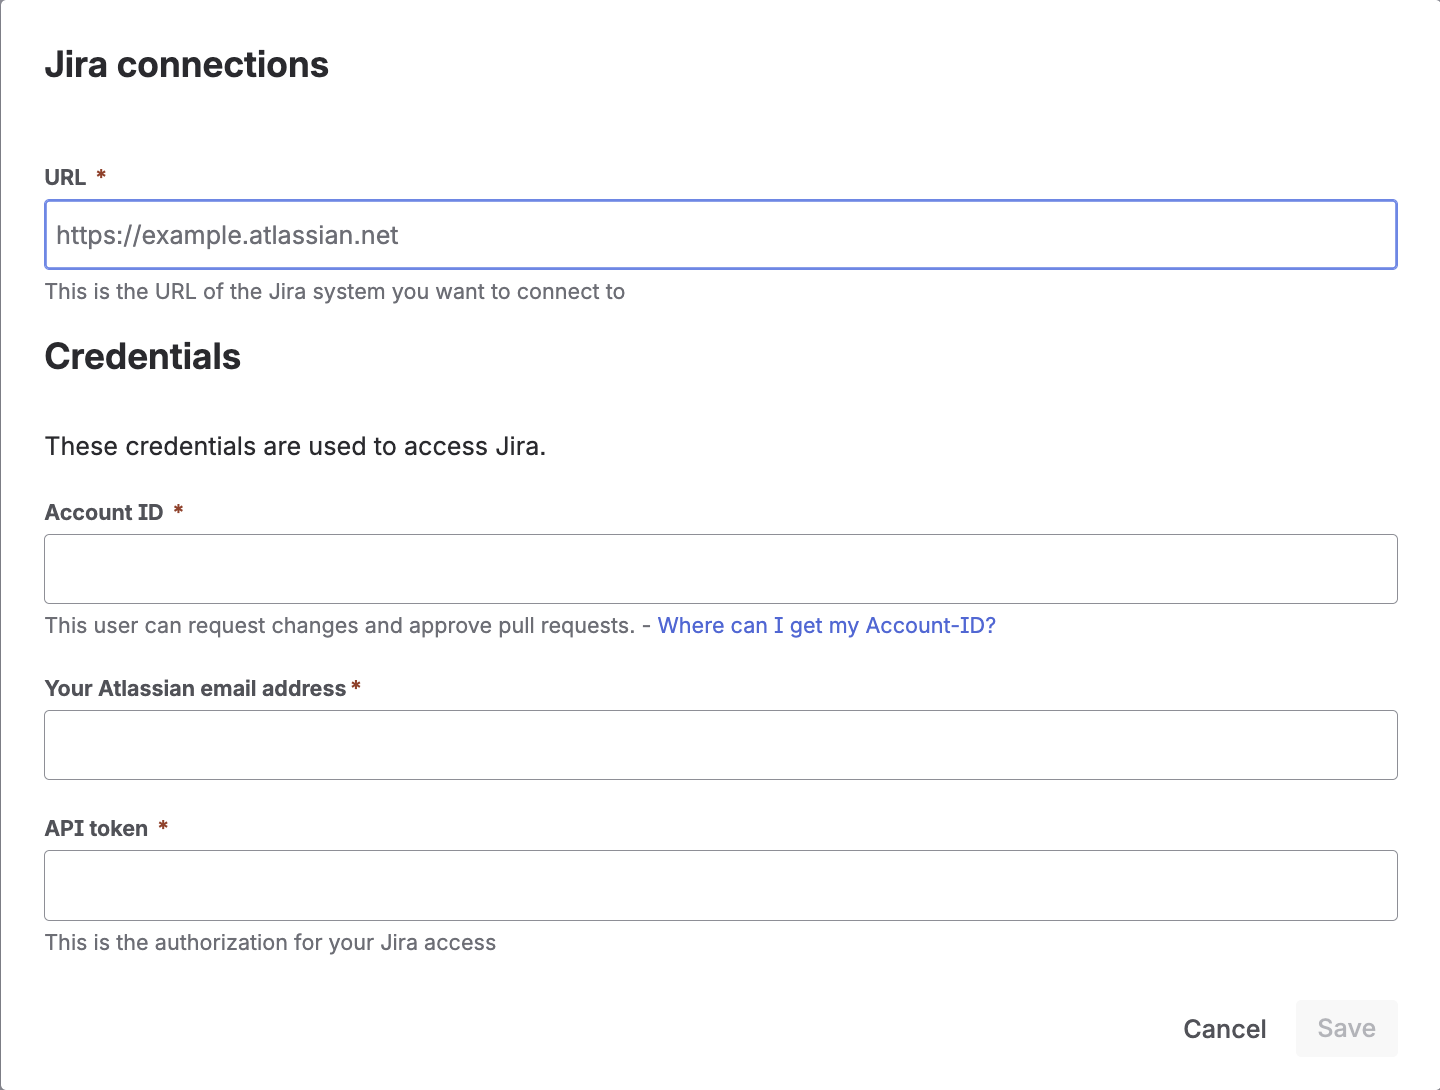
User interface
The following screenshot shows the Jira connection dialog:
After all fields are completed, select Submit to create the connection. If the connection is created successfully, it appears in the list of Jira connections.
Multiple Jira connections
It is possible to configure multiple Jira connections. When multiple connections are available, the system searches for issue keys across all configured connections. Connections are processed sequentially from top to bottom.
-
The order of connections can be adjusted in the table
-
Processing stops as soon as all required issue keys are found
-
The checks continue after the required issue keys are resolved
This makes it possible to support environments with multiple Jira instances.
Workspace and repository connections
Jira connections are created and managed exclusively at the workspace level.
This means that only workspace administrators can create, edit, or delete Jira connections. This centralization ensures consistent governance, reduces misconfiguration risks, and enforces a uniform security and compliance model across all repositories.
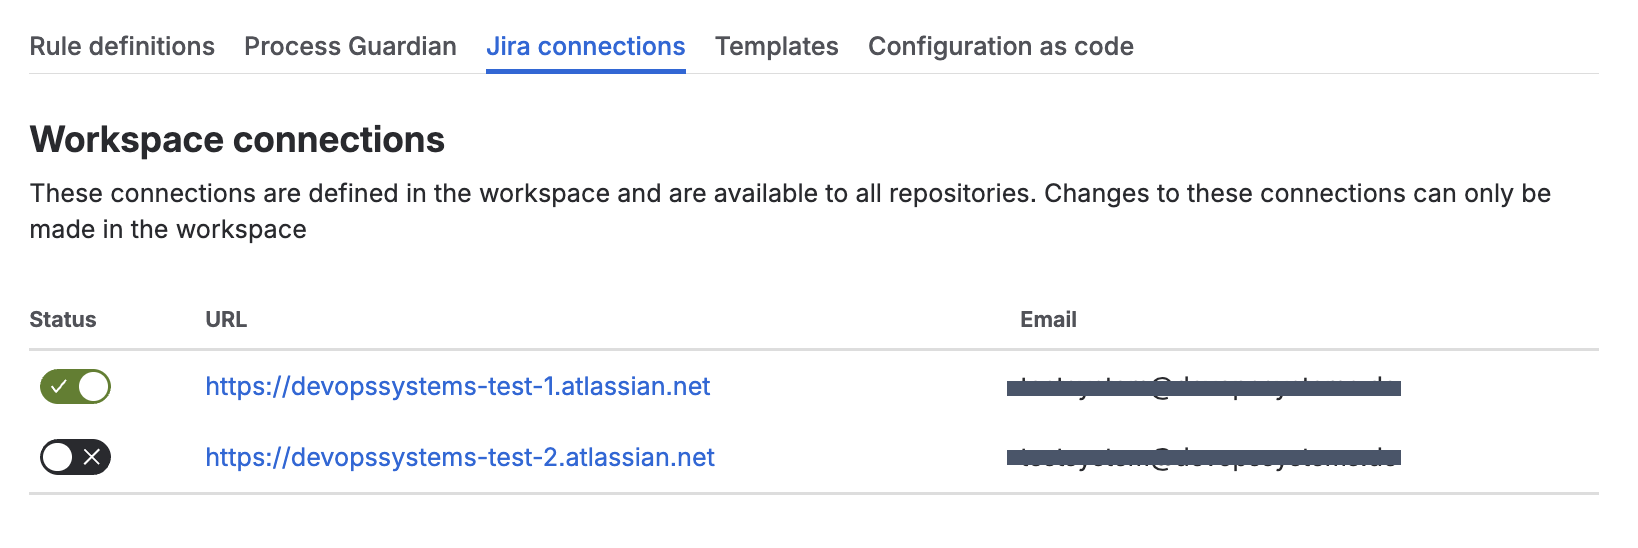
Workspace connections
Workspace connections are available across all repositories in the workspace and are centrally maintained by workspace administrators.
Repository usage
Repository administrators cannot create or modify Jira connections. However, they can:
-
enable or disable existing workspace connections for their repository
-
control which connections are active for their repository
This model ensures centralized governance of Jira integrations while still allowing repository-level flexibility in how connections are used.
Key takeaway
Jira connections provide the technical link between the add-on and Jira and enable validation, traceability, and compliance checks across the development workflow.
Next steps
Create rules: Define your compliance requirements by creating rules. Start with the Templates section to reuse proven configurations and adapt them to your needs.